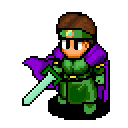
Chapter Three: Could not save him...


Table of Contents

Introduction Scene 32N: Banhamuba Shrine
Scene 25N: Fiduc Castle Scene 33N: Fort Damsa
Scene 26N: Amorika Castle Scene 34N: Griate
Scene 27N: Fort Bodo Scene 35N: Amorika Castle
Scene 28N: Amorika Castle Scene Kappa: Griate
Scene 29N: Tanmas Hill Scene 36N: Coritani Castle
Scene Gamma: Krizar Scene 37N: Wyoburi Volcano
Scene Epsilon: Fort KadorigaScene 38N: Rime
Scene 30N: Ashton Scene 39N: Amorika Castle
Scene 31N: Mount Hedon Scene 40N: Fiduc Castle


Introduction

Four weeks have passed since the Bacrum Army occupied Rime... After the fierce battle in Rime, Bacrum continued to invade the south. But the Walsta Liberation Army, who absorbed some of the Gargastan troops, were able to stop the invasion of Bacrum. The battle between the Walsta Liberation Army and the Bacrum Army at the Gruborza Plains came to a dead lock.

Branta, the leader of the Bacrum Army, was becoming anxious. The odds of winning the war was now fifty-fifty. However, if Duke Ronway gets complete control of the Gargastan Army, it is obvious that Bacrum will lose its chance for victory. Branta asked the Dark Knights several times for support, but the Roslolians ignored him and stayed in Fiduc Castle. Duke Ronway's Army was not organized either and felt uneasy to see the Dark Knights not making a move. He was not sure if the secret treaty he had with the Roslolians was still valid...

Both Bacrum and Walsta were not sure of anything...


Scene 25N: Fiduc Castle

The Chapter begins at Fiduc Castle, where Balzepho the Dark Knight is having a meeting with a couple of his fellow Dark Knights, Barbas and Martym. Balzepho reprimands Barbas for acting on his own at Rime without permission, and Martym echoes Balzepho's sentiments. Balzepho doesn't need Martym's help, and reminds him that he did not have permission to speak. Barbas justifies his actions by saying that he was simply following Branta's orders, but Balzepho does not buy into that explanation. Balzepho then accuses Barbas of simply wanting to fight against the Zenobian Knights that were stationed in Rime, and Barbas remains silent until Dark Knight Lans enters the room, accompanied by two other Knights. Balzepho welcomes his lord back to the castle along with his two guests, Dark Knights Oz and Ozma Gracious. Lans tells Balzepho to calm down and inquires about the status of Walsta.

Balzepho informs Lans that the Walsta Liberation Army is gathered on Gruborza Plain, but they have not made any significant movements. Lans explains that by saying that Ronway has not defeated the Gargastan Army yet, and tells Balzepho to send a messenger to Ronway to confirm that their agreement still stands. Balzepho doubts that Branta will remain quiet and obedient under these circumstances, but Lans says that he will have to. He states that it is not the Dark Knights' mission to rule Valeria, and that they cannot risk having Zenobia get involved. Therefore, they will remain neutral.

Lans tells Barbas that he is sending him to Heigm, which causes Barbas to complain. Lans then tells him to calm down, and gives him the real reason why he is sending him there. Apparently the Valeria Liberation Front has rescued Plancy from Heigm, and Lans wants Barbas' help in bringing him back. Barbas decides to cooperate. Next, Lans gives Oz and Ozma the order to deal with the Valeria Liberation Front, saying that the trouble the group causes cannot continue. He gives Dark Knight Andoras the order to continue searching for Manafloa, and asks Balzepho to take Martym and go negotiate with Duke Ronway. Now that the plan has been set, each of the Dark Knights sets off to complete their assigned task...


Scene 26N: Amorika Castle

In the conference room of Amorika Castle, Duke Ronway assesses the current condition of his Army. Leonard estimates that about thirty percent of the former Gargastan Army has joined the Walsta Liberation Army, while the remaining soldiers have either left the military all together or are still fighting for Barbatos. Leonard says that although the Gargastan Army is significantly weaker, it is still quite strong and supported by a number of villages. Therefore, dealing with them may be more difficult than expected. Ronway says that he understands, and asks Leonard to handle the remaining soldiers and clean up as soon as possible.

The Duke tells Denim that his task is to hunt down Vice. Denim seems a little reluctant to take this mission on, and Ronway mentions that Vice is not like Denim. Like the Duke himself, Denim has a purpose; Vice, however, only lives to satisfy his own bloodlust. He knows this, and hates himself for it--for this reason, he is very dangerous and cannot be ignored. Kachua tells Ronway that he didn't have to put a bounty on Vice's head, but Ronway says that it was necessary. Kachua tells Denim to say something but he doesn't; as a result, she becomes frustrated and storms out of the room. Leonard says to let her go, and Ronway informs Denim that the Zenobian Knight Mildain has returned to the castle along with Warren, who is not in good shape. He tells Denim to go visit them when he gets the chance.

Suddenly, a soldier bursts into the room and informs the Duke that the Gargastan Army is attacking the castle. Ronway wonders if they will ever learn, and Leonard and Denim prepare for battle.

(outside of the castle)

Didario: Duke, come out from your castle! You are going to regret what you did to our Cardinal!
Leonard: You fools. Do not underestimate us!!


Didario
Knight
Battle 24N: Amorika Entrance

Objective: Kill the leader!
Leader: Didario (drops Balder Sword)
Enemies: 2 Knights, 2 Berzerkers, 2 Wizards, 1 Witch
Union: Gargastan Kingdom
Guests: Leonard

Didario: Long live the Cardinal!

Back inside the castle, Denim and Canopus go to the room where Mildain and Warren are. After the usual greeting, Canopus asks where Lans and Guildus are. Mildain has not seen either of them since the night Bacrum attacked Rime, but Denim recalls that Guildus came to his aid when he was attacked by Dark Knight Martym. Mildain says not to worry because Guildus will be back, and asks Denim if he has any idea where Vice is. Denim says that he doesn't, but given that he has a price on his head there are only a few places where he could be. Canopus thinks that Vice most likely aligned himself with the guerillas of the Valeria Liberation Front. Mildain says that as he was leaving Rime, he saw a group of Dark Knights heading for Fort Bodo. He heard that they were ordered to wipe out the guerillas--if Vice is with them, he'll be in danger! Mildain says that he will join Denim, and that he will not abandon Vice even if he has to go against the Duke's orders. On to Fort Bodo!

Join up!

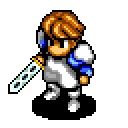
Mildain
White Knight


Scene 27N: Fort Bodo

At Fort Bodo, the Dark Knights have virtually wiped out the Valeria Liberation Front. Ozma has Plancy in her custody, and is about to take him away. Oz asks his troops if there are any survivors, and a couple of the Dark Knights bring Selye over. She fared quite well in the battle, killing most of the Bacrum soldiers from Rime; however, it seems as if her luck has run out. Ozma asks Oz what he will do with her, and after he decides that he can't take her prisoner, he casts Charm on her so that she does not kill herself. Ozma asks Oz if that was really necessary, and tells him to finish his business and return to Fiduc. She takes Plancy and leaves.

(at this time, Denim and his troops arrive)

Sisteena: Selye! Selye!
Denim: Damn it! I'm too late!
Oz: Now what?! The Liberation Army? I want overtime for this!


Oz
Temple Commando
Battle 25N: Fort Bodo

Objective: Kill the leader!
Leader: Oz (drops Gramrock)
Enemies: 6 Templar Knights
Union: Dark Knight Roslolian
Guests: Selye
Notes:
  • Unlike the equivalent battle in the Chaos Route, Selye is actually in this battle, surrounded by the enemy and far away from you. The Dark Knights and Oz will immediately attack her and kill her, making this one of the most difficult saves in the game. It can be done, though. You can use Witches and Warlocks to use Charm and Stun on the Templar Knights. If you have Quick, Jump , and SlowMove, you can also put those to good use! Another strategy is to fight a bunch of random battles at the Gruborza Plains and rack up orbs, which you can use to wipe out the enemy quickly.

  • Saving Selye should be your primary goal in this battle, but if you have a spare turn or two, one of the enemy Templar Knights has HealRain, which you may want to kill him to get.

Oz: I can't die in a place like this! It...hurts...


After the battle, Denim, Sisteena, and Selye go inside Fort Bodo. Selye informs Denim that his father is still alive, and that he has been re-captured by the Dark Knights. Denim and Sisteena ask why the Roslolians wanted Plancy so badly, but Selye doesn't know. What she does know is that Plancy is the only person that knows about Manafloa, and is the key to understanding the truth behind the war in Valeria. She says that they should leave Fort Bodo in case the Dark Knights return. Denim and Sisteena ask Selye to go with them, but she refuses, saying that she cannot work under someone who can justify murdering innocent people. As the leader of the Valeria Liberation Front, she has an obligation to keep fighting for her comrades who died. Before she departs, Selye asks Denim to take care of Sisteena. Denim is excited that his father is still alive, and he and Sisteena leave Fort Bodo and head back to Amorika.


Scene 28N: Amorika Castle

Upon returning to Amorika, Denim finds out that some people are very annoyed with him for what he did in Fort Bodo. Fighting the Dark Knights was not a good idea, especially in light of the fact that the Gargastan Army has not been completely defeated yet. Killing Oz was even worse, as it will be very difficult to negotiate with the Dark Knights now.

Duke Ronway says that he will increase the bounty on Vice's head by 10,000 Goth because he cannot deal with him now. The first priority is to take over Coritani Castle and defeat the remaining troops of Barbatos. In the meantime, Ronway is sending Denim to Ashton to investigate a potentially hostile situation. He tells Denim that Sir Guildus is rumored to be there, and that he will be waiting for Denim's report. Denim leaves the conference room and embarks on his journey.

In the main hall, Denim finds Kachua leaving the castle. She sarcastically asks if "Mr. Hero" called her, and Denim asks her if she is still mad at him. Kachua asks why Denim called her, and Denim tells her that Plancy is alive. Kachua asks Denim what he'll do now, and he says that they will go and rescue him. Out of the blue, Kachua tells Denim that Plancy is not their biological father--Denim is the only family she has. Denim doesn't seem to believe that, but asks her why she would tell him such a thing. She says that she is telling him this because he is leaving her. Denim denies doing that, but Kachua doesn't believe him. Despite Denim's pleas, she storms out of the room.


Scene 29N: Tanmas Hill

Ganb: Hey, haven't we met before?! Well, what do you know! I never thought I would bump into you again. Belda and Obda, come! (they do) And this time, I have some new friends! Let me introduce you to them! Banga! Zanga! Come out! (they do)
(to Denim)
I will defeat you!


Ganb
Beast Tamer

Belda
Gryphon

Obda
Gryphon
Battle 26N: Tanmas Hill

Objective: Kill the leader!
Leader: Ganb
Enemies: Belda, Obda, Banga (Cockatrice, Water, N), Zanga (Cockatrice, Water, N)
Union: Gargastan Kingdom
Notes:
  • If you kill Ganb's pets, he will become enraged and recover 50 HP for each one that you kill.


(if you kill his animals)
Ganb: Belda! My friend!
Ganb: Obda! Nooo!! What have you done?! You can't die!
Ganb: Banga! Forgive me! I will avenge you!
Ganb: Zanga! Your death will not be in vain!

(when he is down to critical HP)
Ganb: Damn it! Retreat! Just wait... Next time, I will get you! (escapes)


Scene Gamma: Krizar

Required Conditions: Stop by Krizar while on the way to Ashton.

In a house in Krizar, Denim runs into Leonard and a few of his troops. Leonard tells Denim that he is surprised that Barbatos' troops launched an attack from Tanmas Hill. Leonard lost 18 soldiers fighting off the Gargastans at the entrance to Krizar. One of Leonard's comrades, a Valkyrie named Festa, asks Denim why he came to Krizar. Was he helping the Gargastan Army after helping the guerillas? Leonard tells Festa to stop it, but she angrily calls Denim a traitor as she leaves the room. Leonard apologizes to Denim for her actions and says that he must be going, as he has to deal with a situation down at Fort Kadoriga. Apparently Barbatos' troops took hostages and escaped there, causing a commotion. Before he goes, Leonard tells Denim not to think too hard--he will always be on Denim's side.


Scene Epsilon: Fort Kadoriga

Required Conditions: After visiting Krizar in Scene Gamma, go to Fort Kadoriga.

Denim and his comrades arrive at Fort Kadoriga to find Festa and two of her comrades petrified, helpless before the Gargastan soldiers.

Denim: Festa! Are you alright?!
Botes: I will turn you into stone as well! This is our revenge!


Botes
Wizard
Battle Epsilon: Fort Kadoriga

Objective: Kill the leader!
Leader: Botes (drops Petrify)
Enemies: 2 Witches, 3 Archers, 1 Ninja
Union: Gargastan Kingdom
Guests: Festa, Tamuzu, Kamos
Notes:
  • Saving the guests won't be difficult in this battle--Festa and Kamos are well out of the enemy's range and although Tamuzu is significantly closer to the enemy, they won't attack him if there's an active character in their attack range. Tamuzu has pretty good defense which is augmented further by the petrification, so he can take a couple of hits. Get to him as soon as you can, though.

  • The two Archers will drop the Spark Shoes and the Grease Shoes when you defeat them.

  • If you play your cards right, you can get three Petrify spells in this battle. Botes drops one when he is killed, and the two Witches each have one. They won't necessarily drop theirs when defeated though, so it'd be wise of you to persuade them.

(when they are cured of petrification)

Festa: ...Thank you...
Denim: Where is Leonard? What happened to him?
Festa: He's probably in the fortress. We have to save him!

Tamuzu: Thank you for saving my life.

Kamos I'm too old for this sort of thing. Thank you young man.

Botes: Aah...forgive me...Cardinal...


After the battle, Festa, Tamuzu, and Kamos will join you.

Join up!

Festa
Valkyrie
Join up!

Tamuzu
Knight


Join up!

Kamos
Wizard


Inside the fort, Denim finds Leonard safe and sound. Leonard thanks Denim for saving his life a second time. A man enters the room, and Denim draws his sword. Leonard says not to worry--the man, Haborym, was also imprisoned by the Gargastans and helped him fight them off. Leonard introduces Haborym to Denim, but somehow Haborym was already able to sense that the man in the room was the Hero of Griate. He introduces himself to Denim as Haborym Vandam, and asks Denim if the Dark Knights are his enemies. You can say that they are, or that you aren't sure, but either way Haborym will say that he understands and will ask to join your forces. You have the choice to accept or decline his offer--assuming you accept...

Join up!

Haborym
Sword Master


Note: If you recruit Haborym in this way, his loyalty towards you will be much lower than it would be if you recruited him later on. It would be wise to level him up in battle to get his loyalty up!


Scene 30N: Ashton

Denim and his comrades arrive in Ashton in the middle of the night. Upon arriving, they see that there are two warriors fighting, with a Priestess looking on. One of the warriors looks like Guildus!

Priestess: Debordes!
Denim: Guildus?! What's going on here?!
Guildus: .........
(the other warrior strikes Guildus)
Guildus: ......... (leaves)
Denim: Wait, Guildus!
(suddenly, a bunch of zombies surround the Priestess and Debordes)
Priestess: Stay back!
(Debordes runs up to the Priestess)
Priestess: Debordes!

Battle 27N: Ashton

Objective: Kill all enemies!
Enemies: 4 Soldier Zombies, 2 Amazon Zombies
Union: Corpse
Guests: Orias, Debordes
Notes:
  • Orias and Debordes will join your party after this battle only if Orias survives. Of course, she's the tough one to rescue! Debordes is a Terror Knight and can take quite a few hits from the zombies, but Orias will die after a couple of hits. You probably will not want to wait for Presance to gain enough MP to use Exorcism, but bring him along anyway. Magic users are extremely valuable in this battle--offensive magic users can work on knocking the zombies out, and supplemental magic users can either disable the zombies or use Jump to get Orias on top of a house, where she'll be out of the zombies' reach. Have all of your attackers focus on the zombies! If that strategy is not working for you, then you may want to fight some random battles and accumulate some orbs, which will wipe the zombies out.


Denim: What happened to you Guildus?


After the battle, Denim goes inside one of the houses with the Priestess and Debordes. The Priestess introduces herself as Orias, and asks Denim if he knows the foreign Knight that tried to kill her. Denim identifies him as Guildus, and Orias tells him that Guildus is no longer who he was. Like the zombies that tried to kill them, Guildus has been brought back from the dead by Necromancer Nybbas, who happens to be the father of Orias and Debordes. Denim is shocked to hear this, and Orias asks if she can join forces with Denim to kill her father. Denim asks Orias if she is serious, and she tells Debordes to take his helmet off. He eventually obeys, revealing his zombie-like complexion which is the work of his father Nybbas. Debordes belonged to an anti-Barbatos group and was executed, and Nybbas used his experiments to try and bring Debordes back. Now Debordes is just a hollow piece of flesh without a soul. Orias hates her father for this, and for the fact that he gave in to the man who killed her brother for the sake of his experiments. She wants revenge! At this point, you get to decide whether or not you want to recruit Orias and her brother Debordes. Assuming you choose to...

Join up!

Orias
Priest
Join up!

Debordes
Terror Knight


Scene 31N: Mount Hedon

Denim: (to his comrades) They must all be zombies too. Be careful!

Battle 28N: Hedon

Objective: Kill all enemies!
Enemies: 1 Knight Zombie, 1 Berzerker Zombie, 2 Wizard Zombies, 1 Amazon Zombie, 2 Archer Zombies
Union: Corpse


Denim: Where is Nybbas?!


Scene 32N: Banhamuba Shrine

Denim: (to his comrades) Don't fall into the hole! Don't get close to it! Be careful!

Battle 29N: Banhamuba

Objective: Kill all enemies!
Enemies: 1 Skeleton, 2 Ghosts, 1 Knight Zombie, 1 Wizard Zombie, 1 Amazon Zombie, 1 Archer Zombie
Union: Corpse


Denim: Guildus! Are you there?! Answer me!!


Scene 33N: Fort Damsa

At Fort Damsa Guildus has returned to Nybbas, who is evaluating him. It seems as if Guildus is yet another of Nybbas' failures. Nybbas talks about how he came so close to perfecting the art of necromancy with Debordes--he fixed the problem of cell decay, but he was unable to recover Debordes' soul. Guildus didn't even make it that far. As Nybbas prepares to use something on Guildus, Denim and his comrades appear.

Orias: Father, stop this! Don't make people suffer anymore!!
Nybbas: When did I ever make people suffer? Are you talking about those zombies? The zombies didn't attack the town by my order. They hate people that are alive. They simply want to draw people into the same situation. What I did was make their wish come true. They wanted to live so badly. I should be thanked, not condemned. Orias, do you want to save their souls in your God's way? You couldn't even save Debordes' soul. What can you do for them?
Orias: I am not running away like you did, father! I will never give up living as a decent human being. I will never be like you!
Nybbas: Impressive...you are speaking your mind. You have become strong. Then kill me! I shall call demons from the dark world! (summons undead)

If you don't have Orias in your Attack Team, you'll get this dialogue instead:

Denim: Sir Guildus! It's me, Denim!
Guildus: Denim...
Nybbas: Don't you remember? He used to be your friend.
Guildus: Friend...
Nybbas: Think hard. You saved him at the town of Rime.
Guildus: Saved, Rime...
Nybbas: Yes, and you died. If you didn't save him, you wouldn't be dead. If he were dead, you would be alive! Don't you hate him?! He is the one who has caused all of your pain!
Guildus: If I kill him...
Nybbas: Kill him! Give him all of your pain! I shall call demons from the dark world! (summons undead)


Nybbas
Necromancer

Guildus
Death Knight
Battle 30N: Fort Damsa

Objective: Kill the leader!
Leader: Nybbas
Enemies: Guildus, 2 Ghosts, 1 Archer Zombie, 1 Knight Zombie, 1 Soldier Zombie, 1 Wizard Zombie
Union: Corpse
Notes:
  • Guildus can be a real pain for your team members. He drops the Isleberg when he dies, but you don't have to kill him. Just go for Nybbas and end the battle as quickly as possible!

Canopus: Sorry Guildus. I will end your suffering!
Denim: Damn it!! How can I save Sir Guildus?!
Mildain: Denim! Guildus is dead! All we can do is release his soul from his rotten flesh!
Denim: I can't do that!
Orias: Mother, please give me strength!

(after Nybbas is defeated)

Nybbas: This is the end. I have no choice... Demunza, provide me with the powers of darkness which have been sealed within this ring...
(to Denim) See my power!! (Nybbas dies, but the Undead Ring resurrects him as a Lich)

Nybbas: How do you like my new body? By using the power in this ring, I will be immortal...of course, the tradeoff is you have to give up being a human! We shall meet again! (escapes)
Denim: Nybbas, wait!
Guildus: What am I doing here? What is this...
Denim: Sir Guildus!
Guildus: Denim? Oh, you are alive. I am so glad... (dies)
Denim: Sir Guildus!

Back at Amorika, Duke Ronway and Leonard are talking about Kachua. Evidently, she has been claiming that she will go back to Griate; however, Ronway cannot allow her to leave given the current state of the war. Also, Ronway believes that having Kachua is necessary in order to keep Denim in the Liberation Army. Leonard says that he will try to talk her out of it, and he leaves to go and find her.

In the main hall, he runs into a Cleric. He asks her if she has seen Kachua, but she says that she has not seen her since earlier in the afternoon. Leonard thanks the Cleric and leaves Amorika, wondering if Kachua has already left the castle...


Scene 34N: Griate

Apparently Leonard's instincts served him well, because as he is leaving Amorika we see Kachua standing alone on a dock in Griate. Talking to herself, she says that Denim is the only family she has left. However, a voice cuts her off, saying that that is not true--she is a complete loner. Kachua asks who that is, and Dark Knight Lans appears. She asks him why he is in Griate, and he tells her about her birth--her mother died shortly after giving birth to her, and her father died several months before the war in Valeria began. She has no siblings, making her a complete loner. Kachua tells him that she has a brother in Denim, but Lans retorts by saying that Denim is not really her brother--while she is not Plancy's real child, Denim is. She asks Lans who she is, and he responds by telling her that her real name is Bersalia Overis.

Yes, Kachua is the daughter of the late King Dolgare! She does not believe him, but Lans tells her about how she is not the daughter of the late Queen. King Dolgare lusted after one of his servants, a maid named Manafloa, and it was she who conceived Kachua. Kachua still refuses to believe him, and he proves that his story is true by reading the inscription on her necklace and having her do the same. She asks him what he wants with her, and he tells her that he wants her to go with him to Heigm. At this time, Dark Knights Andoras and Volac appear, and the three escort Kachua to Heigm.


Scene 35N: Amorika Castle

Denim has since returned to Amorika Castle, and is in the process of giving his report to Duke Ronway in the conference room when Leonard arrives. Leonard apologizes for being late, and the meeting continues. Ronway announces that there is a meeting planned with the Dark Knights to discuss the possibility of signing a cease-fire treaty. However, the Duke does not intend to really negotiate peace--he does not believe that true peace can be achieved while Branta is alive. Leonard asks him if he plans to try and take back Rime, and Denim says that there's no way they can launch a direct attack against the Dark Knights and expect to win. Leonard asks Denim what he is so scared of, given that he has already killed a high-ranking Dark Knight. He also says that during the meeting, they will capture Lans and use him as a hostage to control the Dark Knights.

Denim says that that will be hard to do since the Bacrum Army is occupying Rime. Leonard says that Denim will take his battalion and liberate the city, but Denim says that they can't get to Rime without being noticed--the oceans are being watched, and taking a direct route through the Gruborza Plains is out of the question. Leonard says that Denim will get to Rime via the Barnam Mountains; Ronway seconds that idea, saying that only Denim and his forces are capable of doing that.

Suddenly, a soldier bursts into the room and announces that Coritani Castle has fallen to the remaining Gargastan Army. Ronway says not to panic, as it is all part of his plan. Taking over Coritani will be the last victory for the remaining Gargastan Army--as a result of it, the Dark Knights will become careless. Meanwhile, Denim's forces will defeat the remaining Gargastan Army and reclaim Coritani Castle. After that happens, Denim and his troops are free to get through the Barnam Mountains and get to Rime. Now that the plan has been made, it's time to get things started!


Scene Kappa: Griate

Required Conditions: After making plans to attack Coritani Castle, stop by Griate on the way to Coritani. Furthermore, you must not have gone through Scene Gamma and Scene Epsilon.

As Denim and his troops arrive in Griate, they find a covert Gargastan spy unit.
Orgeu: Shit, they've found me! I see! The guy we captured is your comrade, a spy! Just my luck! Oh well, get ready! I will kill you all!


Orgeu
Hawk Man
Battle Kappa: Griate

Objective: Kill the leader!
Leader: Orgeu
Enemies: 2 Berzerkers, 2 Hawk Men, 2 Octopuses, 1 Siren, 2 Witches
Union: Gargastan Kingdom
Notes:
  • One of the enemy Berzerkers has the Aqua Hammer, and will drop it when defeated. Also, the Siren and the Witches will drop a Magi++ when defeated.

Orgeu: Sorry Zaebos. The attack on Amorika is...a failure...


After the battle, we will see a fight in one of the houses. The man captured by Orgeu and his men roughs up some Gargastan soldiers, killing all but one of them. The last soldier begs for his life as Denim enters the house. Denim tells the soldier to get lost, and the man tells Denim that he is very kind to let the soldier live. Denim introduces himself, and the man introduces himself as Haborym Vandam. He will ask to join Denim's fight against the Dark Knights, mentioning that they were the ones that took his sight, and that he has other reasons for hating them. His skills with a sword are second to none, and it's your choice whether or not to recruit him. Assuming that you do...

Join up!

Haborym
Sword Master


Scene 36N: Coritani Castle

As Denim and his troops arrive at Coritani Castle's entrance, they find Vice being chased by Gargastan soldiers.

Gargastan Knight: It's the Walsta Army!
Denim: Vice! Are you okay?! I'll be right there!
Vice: ...hmmph, who asked you to...shit!
(Vice knocks one of his pursuers off of the castle roof, killing him and allowing Vice to escape)
Zildor: (to the Gargastan Knight) Get him! I will take care of these guys!!
(the Knight runs after Vice, and Zildor's troops come out)
Zildor: I will avenge my lord's death! (to her troops) Kill them!


Zildor
Siren
Battle 31N: Coritani Entrance

Objective: Kill the leader!
Leader: Zildor (drops Galdia Fan)
Enemies: 2 Terror Knights, 2 Wizards, 2 Valkyries, 2 Archers, 1 Cleric
Union: Gargastan Kingdom
Notes:
  • The Cleric has the Wing Shoes. Persuade her to get her equipment if you can!

Zildor: Barbatos...forgive me...
Denim: Let's get this over with! We will take back Coritani Castle!

(inside the castle)

Zaebos: We are the only survivors of the Gargastan Army. Take a good look at us, kid! This is how a true warrior dies!


Zaebos
Knight
Battle 32N: Coritani

Objective: Kill the leader!
Leader: Zaebos (drops Fafniel)
Enemies: 2 Knights, 1 Wizard, 1 Exorcist, 2 Valkyries, 1 Witch, 1 Cleric, 1 Golem
Union: Gargastan Kingdom

Notes:
  • The Exorcist in this battle has Exorcism, and will drop it when defeated. Keep your undead characters away!

Zaebos: This isn't fair...

Denim: Vice! Where are you?! Are you all right?! Answer me!
(Vice's voice is heard, but he is nowhere to be seen)
Vice: I never asked for your help! Are you trying to be the hero again?!
Denim: That's not true! Vice, wait!
Vice: You underestimate me! You are going to regret saving me, Denim! You will pay for your crimes!!
Denim: Wait, Vice!


Scene 37N: Wyoburi Volcano

Denim: (to his comrades) I want to minimize our casualties before we get to Rime. Be careful everyone!

Battle 33N: Wyoburi

Objective: Kill all enemies!
Enemies: 2 Red Dragons, 2 Gryphons, 1 Lizard Man, 1 Faerie, 2 Gremlins
Union: Unknown
Notes:
  • The Lizard Man has the Spark Shoes, in case you feel like persuading him to get them.

  • You can also persuade the Red Dragons and go back to Coritani, where you can auction them off and buy Fire Swords. Unlike in the Law and Chaos Routes, there is no battle where you win one. If you want a Fire Sword, this is the way to get one!

Denim: The real war has just begun! Let's move!


Scene 38N: Rime

As this scene opens, we find that the Walsta Liberation Army has enacted its plan and captured the Dark Knight that came to meet with them. However, it is Balzepho that they captured, not Lans. Balzepho tells Ronway that the Roslolians would have given Valeria to the Walsta Liberation Army, and that they are fools for pulling this stunt. Ronway tells him to shut up, saying that they don't need the Roslolians' help. The Duke tells Leonard to give Denim the order to drive the Bacrum Army out of Rime--Balzepho can't understand how the Walsta Liberation Army could have regrouped so fast. Ronway tells him that it was their plan all along, and that the Dark Knights' stupidity and over-confidence has become their downfall. Balzepho warns Ronway that he will regret his actions later, but Ronway tells him to mind his own business. Because he is such an important hostage, he will remain alive for the time being.

Outside, Denim and his troops confront the Bacrum Army stationed in Rime.

Denim: Hear me, soldiers of Bacrum! We are the Walsta Liberation Army! Rime is under our control! Drop your weapons and leave!
Bacrum Knight: What?! Where did they come from?!
Bacrum Wizard: Never mind! We have the support of the Roslolians! (Ozma enters)
Ozma: You are the one who killed my brother! (Dark Knight enters)
Dark Knight: Ozma! Sir Balzepho is...
Ozma: What?! It's a trap?! (to her troops) Damn it! Retreat! (they do)
Denim: Do not expect any help from the Dark Knights! Look around you! The Dark Knights have forsaken you and have left you for dead!
Bacrum Knight: Why haven't the Roslolians arrived yet?!
Bacrum Wizard: Do not worry! We can win our own battles! We cannot allow those Walsta bastards to fool us! Let's go!
Denim: Shit! So they want to do it the hard way...
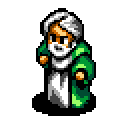
Battle 34N: Rime

Objective: Kill all enemies!
Enemies: 1 Knight, 1 Terror Knight, 2 Wizards, 1 Archer, 1 Dragon Tamer, 1 Hawk Man, 1 White Dragon
Union: Bacrum Valeria Country

Notes:
  • One Wizard has Kaminari, and the other Wizard has Fenril. The Knight has the Grease Shoes and the Terror Knight has the Warp Shoes, which they will drop when defeated.

Denim: (to his troops) We got Rime back!

Back in the church, it appears as if everything is under control. A Walstanian soldier informs Leonard that Denim has successfully gained control of Rime. Leonard asks Ronway for permission to launch an attack on Fiduc Castle, and Ronway says to make it short and sweet. Suddenly, a commotion is heard in the room where Balzepho is being held. Ozma's voice is heard, asking Balzepho if he is all right. Leonard runs to the room, but the door is locked--in a couple of swift dashes, he knocks the door open and runs into the room. He finds that Balzepho is gone, and that the guards that were holding him have been slain. Suddenly, he hears noise coming from the room that Ronway is in. He runs back to the other room.

In the other room, a battered and bloody Vice is holding Ronway at knifepoint. Ronway asks Vice how he got into the church, and yells to Leonard for help. Leonard asks Vice what he is doing, and after noticing that Vice is badly injured, offers to take care of his wounds if he drops his weapon. Vice doesn't listen, saying that they used him as cannon fodder. Ronway tells Vice that he will grant him a pardon if he spares his life, but Vice goes ahead and stabs him anyway. Ronway's guards immediately attack Vice in full force, killing him. Before he dies, Vice utters Kachua's name. It seems as if what was a huge success has become a complete disaster...


Scene 39N: Amorika Castle

Back at Amorika Castle, we find that the Liberation Army has suffered a huge blow to their morale due to Ronway's death. Various officers within the ranks of the Army are meeting with Leonard in the conference room, and they express their doubts that they can still win without Ronway. Leonard gives an inspirational speech, saying that they owe it to Ronway to fulfill his dream, even after his death. He reminds them what they are fighting for, and who they are fighting against; he tells them never to forget the purpose of the war. The officers are comforted and inspired by Leonard's words, and ask him to lead them into battle. Leonard says that they will execute their original plan and attack Fiduc Castle. He will lead forces and attack one side, while Denim and his forces will attack from the other. Now that the plan has been made, it's time to set it in motion!


Scene 40N: Fiduc Castle

At this point, you have the option of going to either West Fiduc or South Fiduc.

(West Fiduc, outside of the castle)

Mercury: Fools!! They are attacking us from the front. Stupid bastards!


Mercury
Sword Master
Battle 35N(w): West Fiduc

Objective: Kill the leader!
Leader: Mercury (drops Wing Armor)
Enemies: 1 Terror Knight, 2 Archers, 2 Dragon Tamers, 1 White Dragon, 1 Black Dragon, 1 Wizard, 1 Siren
Union: Bacrum Valeria Country
Notes:
  • One Archer has the Light Bow, the other has the Ice Bow, the Terror Knight has the Aqua Armor, the Wizard has MagmaGod, and the Siren has Gnome. Kill these enemies to get their equipment, but be sure to keep away from Mercury or else you'll kill him with counter attacks before you can get all of the special equipment.

  • Once you've killed some of the enemies, Mercury will call for reinforcements each round, causing random Soldiers, Amazons, Sirens, and Knights to appear. Unless you're looking for extra kills or experience, it'd be wise to head straight for Mercury once you've gotten all of the special equipment!

Mercury: What are the Dark Knights of Roslolian doing...? Have they...forsaken...us...?


(South Fiduc, outside of the castle)

Bestear: The Roslolians will be here soon, don't worry guys! Charge!


Bestear
Witch
Battle 35N(s): South Fiduc

Objective: Kill the leader!
Leader: Bestear (drops Phoenix Armor)
Enemies: 4 Knights, 2 Wizards, 2 Archers, 1 Cleric
Union: Bacrum Valeria Country

Notes:
  • One Archer has the Sand Bow, the other has the Fire Bow, one of the Knights has the Granite Armor, one Wizard has MagmaGod, and the other Wizard has Gnome. Kill these enemies to get their equipment. Try to keep your characters somewhat apart from each other and facing Bestear. She uses Charm and Stun, which can cause big trouble for your team--following the aforementioned tip will minimize her success rate with those spells.

  • Once you've killed some of the enemies, Bestear will call for reinforcements each round, causing random Knights, Wizards, and Priests to appear. Unless you're looking for extra kills or experience, it'd be wise to head straight for Bestear once you've gotten all of the special equipment!

Bestear: Why haven't the Roslolians arrived yet...? What's taking them so long...?


Inside the castle, Ozma reports to Balzepho that Denim's forces have broken through the front gates. Things are looking grim for the Dark Knights, but Ozma tells Balzepho to escape with Lans and Kachua and leave Denim to her and her brother. Balzepho accepts Ozma's request and wishes her luck as he prepares to leave the castle.

Leonard's group breaks through the defense first, and the new leader of the Walsta Liberation Army enters Fiduc Castle. He encounters Kachua, who thanks him for coming to save her. As he approaches her, she suddenly pulls out a knife and stabs him. He falls to the floor as Dark Knight Lans enters the room. Lans tells Kachua to come to him, and she does; Ozma enters, and tells Lans that he should leave the castle immediately and meet Balzepho outside. Lans and Kachua leave as Denim enters the room.

Denim: Kachua! (runs to Leonard) Leonard! Hang in there! Don't die!
Leonard: I leave it...to..you...ungh... (dies)
Denim: Leonard!!!
Ozma: I will be your opponent! Today is the day you will pay for the death of my brother! (summons troops)
Denim: Kachua!


Ozma
Temple Commando
Battle 36N: Inside Fiduc

Objective: Kill the leaders!
Leaders: Ozma (drops Rosebud Whip)
Enemies: 2 Wizards, 1 Dragon Tamer, 1 Cleric, 3 Templar Knights, 1 White Dragon, 1 Black Dragon
Union: Dark Knight Roslolian


Ozma: ...Glory to Lodis...
Denim: Kachua, why...?


Ending Thought: I remember what Leonard said to everyone... How sincere was he? And what about me...?


Chris: At this point, you will proceed to Chapter Four.

Alternatively, you can choose to go back to the
Valeria Page.