Chapter Four: Hand in Hand


Table of Contents

Introduction Scene 48: Fiduc Castle Scene 51: Fiduc Castle Scene 53: William City
Scene 41: Heigm Castle Scene Mu: Baramus Scene Iota: Grimby City Scene Chi: Fiduc Castle
Scene 42: Fiduc Castle Scene Tau: Fort Kadoriga Scene Xi: Nimuraba Forest Scene Omega: Boulder Desert
Scene Nu: Amorika Castle Scene Zeta: Griate Scene Eta: Coritani Castle Scene 54: Heigm Castle
Scene 43: Vahanna Plateau Scene Sigma: Hell Gate Sidequest Scene Psi: Fort Damsa Scene 55: Heigm Castle
Scene 44: Brigantes Castle Scene Rho: Brumor Plateau Scene Phi: Fort Bodo Scene Lambda: Krizar
Scene 45: Mount Hedon Scene Gemma: Amorika Castle Scene Upsilon: Fort Gerdo Scene 56: Eden
Scene 46: Banhamuba Shrine Scene 49: Lanbees Hill Scene Pi: Fort Gekko Scene 57: Beyond Eden
Scene 47: Heigm Castle Scene 50: Banisha Castle Scene 52: Yomlahaba Ravine Endgame


Introduction

The news of Fiduc Castle's liberation has immediately spread, surprising the Bacrum population. Especially, the fact that the leader of the enemy was a 16-year old kid was even more amazing. They were disappointed to see how Branta was not trustworthy. The Dark Knights' defeat was also unexpected.

But the biggest news was that the daughter of the late King Dolgare was alive. The discovery of King Dolgare's daughter, Kachua, brought hope to the people. They hope she will be the savior of the world and bring peace. People are getting tired of the war. Lans Tartare, a delegate of Lodis, accepted Kachua as the legal successor to the Valerian King and claimed that the struggle for power has ended. Lans' statement made it clear that the cause of the war was triggered by a few selfish men craving to rule the island and it was not caused by different ethnicity nor ideologies.

But the people who agreed to what Lans was saying were mainly aristocrats and it did not stop the Anti-Bacrum movement from spreading throughout the island. The Valerian War is no longer an ethnic war. It was a war between the ruler and the peasants. It was a war for freedom...


Scene 41: Heigm Castle

We begin the chapter to find Lans Hamilton imprisoned in an underground jail in Heigm Castle. Lans Tartare enters the jail and, after expressing his surprise in finding Hamilton still alive, tells the prison guard to leave the room. Tartare asks Hamilton if he can hear the riots going on outside; Hamilton says that it will only be a matter of time before the Dark Knights are defeated. Tartare asks Lans if he realizes that it is not the Roslolians' intention to rule Valeria, but Lans doesn't respond. A Bacrum soldier outside can be heard calling for the Roslolians' help, saying that the Bacrum forces cannot handle the rioting. Lans Hamilton says that the people are getting more restless each day, but Lans Tartare replies by saying that the Bacrum people are of a lower species--they can't begin to comprehend the ideals of Lodis. Hamilton asks Tartare if he had ever considered the possibility that the policies of Lodis were the problem, but the Dark Knight retorts by saying that the people wished to be ruled by force.

Lans Hamilton is somewhat confused by this, and Tartare explains further; he asks the Holy Knight how many people that are capable of achieving their ideals actually do. How many people are willing to risk everything for the sake of their dreams? He reminds Hamilton of the Zenobian revolution that he participated in, and he asks him what the people he helped are doing. They've completely forgotten about the sacrifices made by Lans Hamilton and his comrades, and are sitting around complaining about their own petty problems. Hamilton says that his people are doing the best they can with what they have, but Tartare counters by saying that they are choosing to be the victim because it is easier to be the victim. Holy Knight Lans disagrees, but Lans Tartare says that freedom is not a right one is given--it is something that must be actively seeked out and fought for. People are not willing to do that--all they do is blindly follow whoever is in power.

Lans Tartare says that people are inherently evil, and that they don't mind sacrificing others to improve their own lives. They are always attracted to a source of power that will keep them safe, and they will betray anyone to be safe. He calls Kachua into the jail. To Hamilton's surprise, Kachua enters the room; he is shocked even more when Lans Tartare introduces her to him as the daughter of King Dolgare. Lans Hamilton asks Kachua how this could be, but she replies by saying that not only is Denim not her brother, he also abandoned her. Without him, she doesn't know what to do; getting emotional towards the end of her explanation, she runs out of the jail.

Lans Tartare says that he must go, and that he has not the time nor the desire to torture the man that took his eye. Lans Hamilton calls after Tartare, but the Dark Knight bids him farewell and leaves the underground jail.


Scene 42: Fiduc Castle

In the conference room, Denim is listening to the report of his spy, a Ninja named Shadow. Apparently Kachua has been missing for quite some time as not even Branta knows where she is; furthermore, there is evidence to support the rumor that Lans Tartare and Branta have not been getting along lately. Denim asks Shadow the status of the Dark Knights, and he tells him that most of them are stationed at Heigm Castle. Denim wonders what the Roslolians and the Bacrum Army are up to, and Shadow delivers the news that Lans Hamilton is still alive in a jail under Heigm Castle. However, no information about his condition was available. Denim thanks Shadow for his efforts, and tells him that he can go and rest. Shadow leaves the conference room.

Denim's other advisor, a Wizard named Staff, asks Denim if they should attack Heigm to rescue Lans. Denim says that they cannot because it would be too dangerous to attack without knowing the true intentions of the Dark Knights. Staff warns Denim not to wait too long, or else they will lose their chance for victory. Denim assures him that he is thinking about that as well.

Suddenly, a soldier enters and delivers the news that soldiers in Brigantes have taken hostages and barricaded themselves in Brigantes Castle. Denim says that the Filaha Order is probably responsible for this, as they have continued to gain influence since Kachua was revealed to be the heir to the throne of Valeria. Denim states that using force against the Order will not achieve anything--he is going to go and meet with the leader of the Filaha Order. Staff warns him that it will be too dangerous to make such a risky trip, but Denim says that he is confident that they will listen to him if he goes alone and unarmed. On to Brigantes!


Scene Nu: Amorika Castle

Required Conditions: After making the plan to go to Brigantes Castle, stop by Amorika Castle.

Denim and his comrades return to Amorika Castle to find out that Warren has regained consciousness. Denim asks Warren what the true intentions of the Zenobians are, but at first all Warren says is that they are mercenaries. Apparently Denim does not buy that explanation, and he asks Warren again; this time, Warren decides to tell Denim the truth. As Denim figured out, Lans Hamilton, Warren, Canopus, Guildus, and Mildain were sent to Valeria by the Zenobian King Tristan, but their goal is very different from that of the Dark Knights. We enter a flashback at Zenobia Castle, where Lans, Warren, and Canopus are meeting with King Tristan...

King Tristan tells the three that it was not easy to declare their exile from Zenobia, despite the fact that it was part of their plan. Lans assures Tristan that the best way to fool one's enemies is to fool their own people, and says that they really do deserve to be exiled. The Holy Sword, Brunhild, was stolen from Zenobia by the Dark Knights, and it is their fault that the Dark Knights were able to get the sword. Tristan says that he does not understand why the Dark Knights would want the sword, and wishes Lans and his men the best of luck on their journey to Valeria...

Denim now understands that the Zenobians came to Valeria to recover the Brunhild, and Warren says that it is no ordinary sword--whoever holds the sword can communicate with the Gods. Denim vows to help Guildus, Mildain, and Canopus retrieve the Brunhild from the Dark Knights. Warren thanks him, and Denim tells Warren to focus on his recovery and get better.


Scene 43: Vahanna Plateau

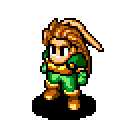
Uram: I have been waiting for this, Denim of Griate! I will kill you to avenge the death of my comrades!


Uram
Wizard
Battle 38: Vahanna

Objective: Kill the leader!
Leader: Uram (drops Aqua Robe)
Enemies: 1 Exorcist, 3 Archers, 2 Witches, 1 Cleric, 1 Ninja, 1 Lizard Man
Union: Defeated Soldier
Notes:
  • The Lizard Man is not a fixed member of the enemy party--sometimes, a Dragon Tamer or Terror Knight will replace him.

  • The Exorcist does have Exorcism, so keep your undead characters away.

Uram: Denim...! How dare...


Scene 44: Brigantes Castle

At this point, you have the option of going to either West Brigantes or South Brigantes.

(West Brigantes, outside of the castle)

Siren: It's the enemy!
Wizard: That's Denim! Why is he here?
Terror Knight: To kill us, you dummy! What do you think?!
Wizard: No way! Denim would never do that!
Terror Knight: (to Denim) Did you come to talk to us?! Then why didn't you visit us from the front gate?!
Wizard: Yeah, he's right!
Terror Knight: How can we trust a man who tries to sneak in from the back gate?! Kill him! Protect our leader!!


Battle 39(w): West Brigantes

Objective: Kill all enemies!
Enemies: 1 Terror Knight, 2 Dragoons, 1 Wizard, 1 Exorcist, 3 Archers, 1 Siren, 1 Cleric
Union: Filaha Order
Notes:
  • The Exorcist has Exorcism, just in case you wanted to know.

  • The Terror Knight has the Black Shield and the Grease Shoes and will drop the former of the two items if you kill him. The Archers have Wing Rings, and the rest of the enemies have Grease Shoes.

Denim: It wasn't supposed to be like this...shit!


(South Brigantes, armed and outside of the castle)

Denim: I came here to talk with your leader. I have no intention of fighting you or harming any of your members.
Dragoon: Liar! How can I trust you?!
Denim: Don't question me.
Dragoon: Even if I die here, my soul will be saved by the Gods. But a man like you...a man who tries to control people by force will be sent to Hell!


Battle 39(s): South Brigantes

Objective: Kill all enemies!
Enemies: 1 Sword Master, 2 Dragoons, 1 Wizard, 1 Warlock, 1 Exorcist, 3 Archers, 1 Cleric
Union: Filaha Order
Notes:
  • The enemy Sword Master has the Black Necklace and will drop it when defeated.

  • The Exorcist has Exorcism and won't be afraid to use it against any undead characters you bring into this battle!

Denim: It wasn't supposed to be like this...shit!

Inside Brigantes Castle, Denim will encounter a few priests who are not happy to see him. They berate him for engaging in battle outside of the castle, and tell him to leave. The leader of the Order, a Priest named Olivia, will come and break up the argument.

If you fight either of the previous two battles, your Chaos Frame will drop 5 points with all of the races. To avoid this, unequip all of your items and magic and go to South Brigantes. When you do this, Denim encounters two guards at the front gate--a Knight and a Berzerker. The Berzerker asks Denim who he is, and after he identifies himself as the Hero of Griate, the Knight will trust him. The Berzerker will not trust him however, and still refuses to let him pass; furthermore, he accuses the Knight of being disloyal to the Order, and draws his sword. The Knight takes exception to this, and draws his sword as well. The two guards are about to start fighting each other when the leader of the Order, a Priest named Olivia, rushes out of the castle to break up the fight.

Regardless of which fight she has to break up, she will introduce herself to Denim as Olivia, the Priestess of the Order. She tells him that Plancy is waiting to see him, but Denim has no idea of what she is talking about. Olivia tells Denim to come quickly, because his father is dying. He was found in the Valley of Death near Heigm, apparently disposed of by the Dark Knights. His condition has gradually gotten worse, and he is nearing his last days. Olivia reveals to Denim that the Dark Knights tortured and drugged his father, and directs him to the room where Plancy is.

Inside, Plancy is delighted to see Denim. He tells Denim that, as he already knows, Kachua is not his real sister. She is the daughter of King Dolgare and Manafloa, his servant. We go through a series of flashbacks:

First we go to Eden, where we see Queen Bernata berating Manafloa for having an affair with her husband. The Queen tells Manafloa that she will not be allowed to leave the castle, and that she will never be anything but a servant. At this time she finds out, much to her dismay, that Manafloa has become pregnant. Later that night, Manafloa escaped from Heigm Castle.

The second flashback takes place in a house in Heigm, where Plancy and Branta are discussing what to do with Manafloa's child, since Manafloa died shortly after she escaped from Heigm. Branta tells Plancy that the child's name is Bersalia, since that was the name King Dolgare wanted to give to his child if it was a girl. Plancy wants to tell Dolgare about the child, but Branta says that they cannot since Queen Bernata is due to give birth less than a month later. He tells Plancy to take the child and raise it as his own--for extra money, Branta gives Plancy a necklace from the King to sell. Plancy says that he cannot sell the King's present, but Branta tells him that he needs money to raise her properly. He tells Plancy not to worry...


Back in the present, Plancy tells Denim that Branta lied and used the child to become Cardinal. He tells Denim that he thinks he should have gone to the King with the child but couldn't, because he loved her so much and wasn't prepared to give her up. Then he warns his son that the Dark Knights have been after her for quite some time--they will use her to get King Dolgare's inheritance, and once they have it they will dispose of her. Plancy tells Denim to find High Priest Moruba, who will be able to help him. Furthermore, he tells Denim that he will be the foundation of justice--he must throw away his selfish desires and make the right decisions. Denim tells his father to hang in there, but Plancy asks him for forgiveness and then dies...

Back in the main hall of the castle, Olivia talks to Denim. At first Denim thought she wanted to discuss some affairs between the Liberation Army and the Filaha Order, but she tells him that she really intends to tell him about his true relationship to Branta. Apparently Branta and Plancy were brothers, which makes Branta Denim's uncle! Denim is not Walstanian, but Bacrumese!! Denim does not believe her at first and even grabs her by her robe, but she tells him a series of stories that proves to him that he grew up in Bacrum and is actually Bacrumese. Denim falls to the floor, dismayed at discovering that he is Bacrumese; however, Olivia tells him to get up and reminds him that it shouldn't matter what his race is--what matters is how he lives his life! After some thought, Denim agrees with what Olivia says and thanks her for talking some sense into him.

If Sisteena and/or Selye are in your party, they will enter the room at this time. After greeting Olivia, the group will discuss the possible location of their father, Moruba the High Priest. Somehow, they decide that he is probably at Banhamuba Shrine attempting to regain his faith. Given that, it appears as if the next destination is Banhamuba Shrine.

Join up!

Olivia
Priest


Scene 45: Mount Hedon

Rotzer: Denim! How did you get here?!
Denim: That's my line! Why are you here?!
Rotzer: You have to kill me first if you want to find out...


Rotzer
Warlock
Battle 40: Hedon

Objective: Kill the leader!
Leader: Rotzer (drops Earth Staff)
Enemies: 1 Terror Knight, 1 Red Dragon, 1 Black Dragon, 1 Valkyrie, 2 Lizard Men, 1 Gremlin, 1 Ghost, 1 Siren
Union: Bacrum Valeria Country
Notes:
  • Did you remember to re-equip Denim after Brigantes?

  • If you want a Gremlin in your party, this is the place to get one! His loyalty is at the lowest level, and he should be pretty easy to persuade at full HP. Be sure to save before trying!

Rotzer: Are you looking for Moruba...? All of your efforts have been for naught...my gang should have captured Moruba...by now...


Scene 46: Banhamuba Shrine

As Denim and his comrades arrive at Banhamuba Shrine, we see that Moruba is here, along with the Bacrum Army. The Bacrum Army is being led by a magician named Shelley, and her troops have captured Moruba. They prepare to bring him back to Heigm when Denim arrives and rescues Moruba.

Denim: Moruba, are you all right?
Moruba: You are...?
Denim: I'm Denim, the son of Plancy Mown.
Moruba: You are Plancy's son...
Denim: We can talk about this later. I will take care of them now.
Moruba: Ok. ...Just don't kill the woman.
Denim: ??
Moruba: That is my daughter Shelley.
Denim: I understand.
Moruba: Thank you...
Shelley: Rotzer is useless...I challenge you, boy!


Shelley
Siren
Battle 41: Banhamuba

Objective: Kill the leader!
Leader: Shelley (drops Dark Law)
Enemies: 2 Knights, 2 Dragoons, 4 Ninjas, 1 Cleric
Union: Bacrum Valeria Country
Notes:
  • Do not kill Shelley--just bring her HP down below 20. If her HP reaches 0 she will die, and you won't be able to recruit her later.

Sisteena: Shelley, stop this or we'll be forced to kill you...
Shelley: I'm not a weakling like the one you just killed. I have a power that you could not possibly comprehend and as long as I have it, I can't lose!
Sisteena: What power?! Are you talking about the Dark Knights?! The Valeria Liberation Front was wiped out by the Dark Knights and Bacrum will soon follow.
Shelley: Then what do you call the Liberation Army?! You guys are trying to destroy Bacrum with your "power." What's the difference?!
Sisteena: We are fighting to end the war! We are not fighting for power! And I will not hesitate to kill you to end this war...

Olivia: Shelley! Stop! Why do we have to fight each other?!
Shelley: Then join me and fight for the Bacrum Army! Why are you siding with father, he couldn't even protect his own wife!
Olivia: Shelley, don't bring our mother into this! Mom's death has nothing to do with our father! The Bacrum Army are the ones who murdered mother!
Shelley: You're wrong, Olivia! Father is the real killer! Father lost the war for power. He was the loser and it cost us our mother's life! In this world there can be no defeat! If you lose you will only regret it later!
Olivia: You're wrong, Shelley! You're the only loser...you were unable to deal with mother's death and you gave up your faith.

Selye: Shelley, go back to Heigm!
Shelley: Is that the only thing you can say to your estranged sister?! I heard that the Valeria Liberation Front was destroyed. But it seems like you survived. I'm glad you're ok.
Selye: ...Yes. I'm alive...and I will not rest until I kill Branta and all of the Dark Knights!
Shelley: ...And you will not hesitate to kill your own sister?
Selye: Don't give me that crap, Shelley! You brought this situation upon yourself! It was your choice!


Shelley: I shall return!

After the battle, Denim talks to Moruba in Banhamuba Shrine. He asks the High Priest for his help, but Moruba asks him what they will accomplish by fighting--regardless of the reason, war brings destruction and chaos. Denim says that he is aware of that, but they need to stop power-craving men such as Branta. They must fight for an era of unity, as there was during the reign of King Dolgare.

Moruba says that it would be impossible to return to such an era, especially when the savior of Valeria is in the hands of the Dark Knights. Moruba asks Denim if he will be able to fight her, and regardless of Denim's reply he will tell Denim that he can't give up. He offers his unconditional support to Denim and heads for Fiduc Castle.


Scene 47: Heigm Castle

In Heigm, we see that Branta is asleep--in fact, he's in the middle of having a dream. In the dream he is in a dark and stormy place, where an apparition suddenly appears in the shadows. Branta doesn't recognize the figure, so he asks who it is. He receives no reply, but another apparition appears in a flash. The apparitions tell him to hurry, but he doesn't listen, saying that they have no right to order him around. Suddenly there is a violent flash, and Branta wakes up.

Branta is back in the conference room of Heigm Castle, and he realizes that he just had a nightmare. A Bacrum soldier enters the room, saying that he has a report to give Branta. Apparently they have lost track of Shelley's unit at Banhamuba. Branta asks the soldier if she was killed by the Liberation Army, but the soldier does not know. The soldier offers to organize a rescue unit and send it to Amorika Castle, but Branta tells him not to bother, saying that he does not need an incompetent warrior who can't accomplish a simple task. The soldier leaves the room, and Branta expresses his anger at the failure of his mission.


Scene 48: Fiduc Castle

Back at Fiduc Castle, Shadow tells Denim that he has located Kachua. She is with the Dark Knights who are training in Banisha Castle. Denim asks Moruba if Dolgare's grave is in Banisha, but Moruba does not know; however, he thinks that it is highly unlikely that Dolgare was buried outside of the royal family grave. Regardless, this is as good of a time as any to launch an attack on the Dark Knights and get Kachua back. Denim tells Staff to send a large number of soldiers to Yomlahaba Ravine to distract the Bacrum Army, while he leads his main unit in an attack on Banisha Castle. The real battle is about to begin!


Scene Mu: Baramus

Required Conditions: You must not have killed Shelley in the battle at Banhamuba. After making the plan to attack Banisha but before actually carrying it out, go to Baramus and get into Training. Cast Storm, or wait for it to rain heavily. Exit Training, and try to leave Baramus.

The rain is intense, and Denim and Olivia run for cover. They enter one of the houses in Baramus and decide to stay there until the rain dies down. While they are there, they discover that Shelley is hiding out in the same house. When they find Shelley, she tells Olivia that she can kill her because she doesn't care anymore; however, Olivia tells Shelley that everyone has been very worried about her--they don't want to kill her! Olivia tells Shelley to come home with her, but Shelley says that she has no home--she has nothing because of Denim! He ruined her plan. She pulls out a knife and points it at Denim.

Olivia tries to restrain Shelley, but Denim moves her aside. He tells Shelley that she can stab him until she's content if it makes her feel better. She doesn't, and Denim asks her what she's waiting for--can't she do it in front of her sister? Shelley drops the knife, and Denim asks her what is wrong with her--can she not tell that everyone loves her? Olivia tells Denim that he has said enough, and she tells Shelley that everything is all right--they can be together again. Shelley starts to cry, and Olivia comforts her, telling her that she can be herself again. Shelley apologizes, and leaves with Denim and Olivia.

Join up!

Shelley
Siren


Scene Tau: Fort Kadoriga

Required Conditions: This scene is available only in the Neutral Route. After making the plan to attack Banisha but before actually carrying it out, go to Krizar. Open up the Warren Report, and read the rumor in the Miscellaneous Section called "Pirates In The Fort." Then go to Fort Kadoriga.

Erig: What made the leader of the Liberation Army come here? Have you come to ask for my help? Or do you want to join with the Ocean Liberty Ally?
Denim:1. No way!
2. Help us!
Denim: No way! You're just good for nothing pirates that disturb the tranquility of the Obello Ocean! You should surrender to us now.
Erig: You sure are a gutsy fellow. She was right. Fine. Then let me see how mighty a warrior you really are.


Erig
Exorcist
Battle Tau: Fort Kadoriga

Objective: Kill the leader!
Leader: Erig (drops Holy Ring)
Enemies: 5 Berzerkers, 4 Valkyries
Union: Pirate
Notes:
  • Erig has Exorcism, just to let you know.

  • As you kill Erig's troops, Valkyries will start appearing every turn. They are magician-types, and will use AcidRain rather than attack with a weapon.

Erig: No...this wasn't my plan...


Denim: Help us! What good is it to disturb the oceans and make people suffer? Let's build a new future together!
Erig: We are bound by the teaching of the Gods and the rough waves of the sea! We are not interested in the ground-bound people who crave power!
Denim: If you don't join us then I will be forced to kill you! A pirate's only goal in life is to make innocent people suffer!
Erig: You are one gutsy lad. She was right. Fine. I have no desire to fight you. Let me put my sword away. I want you to meet someone. Her name is Selye.
Denim: Why is Selye with these pirates?
Erig: We are not pirates. We are members of the Valeria Liberation Front. We'll talk about the details when we see her. Trust me.
Denim: Very well...but if you're lying, you're a dead man!

(inside Fort Kadoriga)

Denim: I heard that the Valeria Liberation Front was destroyed.
Selye: When we were attacked at Fort Bodo, these guys happened to be on board. I was very lucky that I bumped into Erig in the port of Rime... I heard a lot about you. You have become a real hero.
Denim: Really?! I didn't think I was the type. Selye, will you join us? We are fighting for the same thing.
Selye: Of course, I shall join you. You saved my life at Fort Bodo, it's time for me to repay you.


Join up!

Selye
Valkyrie
Join up!

Erig
Exorcist


Scene Zeta: Griate

Required Conditions: This scene is only available in the Law Route, if Zapan survived the battle at Fort Kadoriga and you did not recruit him then. After making the plan to attack Banisha Castle but before carrying it out, go to Griate.

Zapan: Hey! Long time no see! I heard that you've got quite a career going!
Denim: Zapan? What are you doing here?
Zapan: Working. I came to get your head!
Denim: What?! Who is your boss?!
Zapan: Sorry, kid. You should have hired me then.


Zapan
Berzerker
Battle Zeta: Griate

Objective: Kill the leader!
Leader: Zapan (drops Procs Axe)
Enemies: 1 Exorcist, 1 Archer, 1 Dragon Tamer, 1 Siren, 1 Cleric, 1 Faerie, 1 Hawk Man, 1 Lizard Man, 1 Black Dragon
Union: Bounty Hunter
Notes:
  • Do not kill Zapan--just get him below 20 HP! You'll get the chance to recruit him.

  • The Exorcist has Exorcism. Also, the Faerie has an EarthOrb.

(when Zapan is at critical HP)

Zapan: Wait! Please! Spare my life!
Denim: Are you begging for your life, Zapan? Aren't you a professional spy?
Zapan: I make it a policy of mine not to die in war! You can buy me at a cheap price! Come on, please!
Denim:1. No way!
2. Fine!
Denim: No way! If you are a professional spy, then fight like one!!
Zapan: You are the most stubborn kid I have ever known!!

Zapan: I should have been on the winning side from the beginning...


Denim: Fine! But don't you dare betray me!
Zapan: Of course! I'll never do that! Trust me!
Denim: I wonder... Oh well, I'll let you join us...
Join up!

Zapan
Berzerker


Scene Sigma: The Hell Gate Sidequest

Required Conditions: After making the plans to attack Banisha, go into the Miscellaneous Section of the Warren Report and read "Freak Explosion." The path to Hell Gate will open...

Battle Sigma1: Madra

Objective: Kill all enemies!
Enemies: 1 Holy Dragon, 2 White Dragons, 2 Blue Dragons
Union: Unknown
Notes:
  • With all of the Dragons, this may be a tough battle. You may want to try persuading some of them, as you can auction Blue Dragons at Fiduc Castle for a Blue Claw, and you can auction Holy Dragons at Rime for a Dragon Helmet, at Ashton for a Dragon Shield, or at Baramus for a suit of Dragon Armor.


Battle Sigma2: Brumor Plateau

Objective: Kill all enemies!
Enemies: 2 Berzerkers, 2 Ninjas, 3 Beast Tamers, 2 Cyclopses
Union: Thief
Notes:
  • Your biggest threat here will probably be the Beast Tamers, who can wreak havoc against your party with their bows. Take them out as soon as possible, with either strong attacks or with Haborym's Petrify.


Battle Sigma3: Botegen Plains

Objective: Kill all enemies!
Enemies: 1 Sword Master, 2 Ninjas, 1 Wizard, 1 Siren, 1 Witch, 2 Hawk Men, 1 Gryphon
Union: Defeated Soldier
Notes:
  • The toughest part of this battle is that the enemy is attacking you on two fronts, and you will probably have to divide your team to fight them. Bring a few healers with you!

  • The enemy Witch has Petrify, and you'll need to persuade her to get it.


And with that, you are at the front door of Hell Gate. The
Hell Gate Guide deals extensively with Hell Gate itself!


Scene Rho: Brumor Plateau

Required Conditions: This scene is only available in the Law Route. Get into a random battle at Brumor Plateau and put Jenounes in your Attack Team. If you want to recruit Oxyones, you need to have put Jenounes in your Attack Team in the battle against Guacharo at Coritani in Chapter Three.

Oxyones: Dragoon! I have finally found you! I will avenge my parents' death!
Jenounes: You are a Dragon Tamer? Then, you are from Bask Village?!
Oxyones: You may have forgotten, but I haven't! Just because you became a member of the Liberation Army doesn't mean your evil deeds have been cleansed!


Oxyones
Dragon Tamer
Battle Rho: Brumor Plateau

Objective: Kill the leader!
Leader: Oxyones (drops Saint Crossbow)
Enemies: Cloud (Holy Dragon, Wind, L), Shadow (Holy Dragon, Fire, L),
Typhoon (Holy Dragon, Earth, L), ClearSky (Holy Dragon, Water, L)
Union: Unknown
Notes:
  • If you didn't bring Jenounes into the battle against Guacharo in Chapter Three, you can't get Oxyones to join your party. You can persuade her Dragons, but you'll have to kill her.

  • Do not kill any of her Dragons--they will join your party along with Oxyones!

Jenounes: Wait, humble Dragon Tamer! I know apologizing will not bring your parents back. It was a mistake, I regret what I have done.
Oxyones: Do not apologize! It doesn't make any difference. My parents are dead! You say you regret what you did. You should never have done such a thing from the beginning!
Jenounes: You are right. And I am aware that regretting or apologizing will not change anything. Just give me time to redeem myself! I am fighting to bring the war to an end. I was part of the group that triggered the war. That is why I feel responsible, I must correct what I have done! Once I finish my duty, I will come back to you and you can kill me. Please give me a little more time!!
Oxyones: That is... That is too selfish!!

Denim: I know he burned down your village. But it wasn't from his own will. It was the Cardinal and his men who tricked him. He was told that there were guerillas in your village.
Oxyones: Does that make him innocent?
Denim: No. I am telling you what he says is the truth! He's not giving an excuse to run away from you.
Oxyones: .........

(after you get Oxyones to critical HP)

Oxyones: Dad... Mom... I don't think I can avenge your death...
Denim: Then the battle is over! Trust me! I will take care of everything...
Oxyones: What are you up to?
Denim: I'll give you a chance to live. And as long as you are alive, you will have your chance to kill Jenounes. Isn't that what you want? ...But you have to give him time. You have to wait until he completes his mission. Meanwhile, I want you to find out the truth for yourself!
Oxyones: .........


Join up!

Oxyones
Dragon Tamer
Join up!

Cloud
Holy Dragon


Join up!

Shadow
Holy Dragon
Join up!

Typhoon
Holy Dragon


Join up!

ClearSky
Holy Dragon


Scene Gemma: Amorika

Required Conditions: Recruit Deneb, and go to Amorika Castle.

Outside of the room where Warren is resting, we hear a man's voice and a woman's voice. The man is telling the woman to stay out of Warren's room, because he is resting. The woman ignores the order in runs into the room--we see that the woman is Deneb.

The man follows her into the room. It is Canopus. Deneb says that Warren is her friend, but Canopus tells her that she's lying--all she did was make a bunch of pumpkin monsters that almost killed him! Deneb tells Canopus that he is really mean, and calls him "Canopoo." Deneb tries to wake Warren up, but Canopus doesn't allow her to. She says he should get a new body to look younger, and Canopus says that he isn't like her--he doesn't care to be young. Deneb tells Canopus that the body she has is her original body, and Canopus sarcastically says that he believes her. She says that she won't be insulted by a red-haired duck, and Canopus gets really annoyed. He insists that he is not a duck, but Deneb says that "Canopoo" looks really cute when he's angry. Frustrated, Canopus leaves the room. Deneb goes over to Warren, gives him a kiss, wishes him well, and then leaves as well.


Scene 49: Lanbees Hill

Pajo: Why are you here?! Yomlahaba's troops are a trap! I bet you are going to go south from Banisha, but I will not allow you to do that!


Pajo
Dragoon
Battle 42: Lanbees Hill

Objective: Kill the leader!
Leader: Pajo (drops Faerie Armor)
Enemies: 4 Dragon Tamers, 2 Thunder Dragons, 1 Holy Dragon
Union: Bacrum Valeria Country

Pajo: You...betrayed...your own...you traitor...


Scene 50: Banisha Castle

(outside of the castle)
Dark Knight: The Liberation Army!! Why are they in Banisha?!
Denim: Drop your weapons and surrender! Then we shall not harm you!
Dark Knight: Stupid boy!! You are in no position to talk! I will make you pay for the death of master Oz and Ozma! I'll show you the true power of the Roslolians!!

Battle 43: Banisha Entrance

Objective: Kill all enemies!
Enemies: 5 Templar Knights, 2 Golems
Union: Dark Knight Roslolian
Notes:
  • Just as a warning, one of the Templar Knights has Exorcism.

Denim: Very well, it's your funeral!!

Inside the castle courtyard, Lans Tartare and Barbas are discussing the current invasion by the Liberation Army. Barbas says that this is the time to avenge Oz's and Ozma's deaths, but Lans tells him not to be so hot-headed because the Liberation Army is far stronger than it was before. Barbas says that he will fight them anyway, and then asks Lans if he is planning to leave Valeria. To his shock, Lans says that it is the King's order. Barbas says that they cannot back down--they have to fight. Denim and his troops enter the courtyard.

Denim: Kachua!! Tartare! Give my sister back!
Lans: I will let you handle this!
Barbas: Trust me. I will show them who has real power.
Lans: Come this way, Kachua! (Kachua and Lans exit)
Barbas: (to Denim) I was waiting for you, kid!!
(jumps off the balcony onto the ground, and summons some troops)
Barbas: Challenging me from the front gate, you've got some pretty big ones for being a mere child!!
Denim: That's the same thing your dead friend said.
Barbas: You son of a...! Come here! I want to show you something! (pulls out a gun) Do you know what this is? This is called a gun. I heard this weapon is more powerful than magic. (he shoots the gun, accidentally killing one of his own Knights) Shit, this weapon is too powerful! I'm gonna hurt myself with this thing!! Hey you, hold this! (gives the gun to one of his troops) I guess Knights should stick with swords. Come, Denim!


Barbas
Temple Commando
Battle 44: Banisha Courtyard

Objective: Kill the leader!
Leader: Barbas
Enemies: 6 Templar Knights, 2 Tiamats
Union: Dark Knight Roslolian

Notes:
  • Be sure to kill the Templar Knight that Barbas gave the gun to, so that you can win yourself one of the three guns in the game!

  • One of the Templar Knights has Exorcism, so be on your guard!


Vice: I remember you! I know you!
Barbas: What is it, kid?!
Vice: Denim! It's him! He is the one who burned down and massacred the people of Griate!
Denim: What?!
Vice: I'm sure of it. He's the one who killed my dad!!
Barbas: Oh, now I remember you! Prepare to join your father in Hell!
Vice: I don't think so! I will be sending you to Hell to apologize to my father, you bastard!

Canopus: So, you are the Roslolians that I heard about! The Knights who invaded Rime and murdered innocent people! Not only that, you even attacked my blood brother! Where is Lans?!
Guildus: Excuse me?! Since when did our leader become your blood brother?!
Canopus: What else should I call him, a blood dad?! I'm not that old!
Barbas: What the hell is that duck quacking about?! Shoo, before I turn you into Peking Duck!
Canopus: Duck?! Who are you calling a duck?! I'm pissed! At least I don't look like a baboon!!

Mildain: You are going to pay for what you did in Rime.
Barbas: Listen to that loser from Rime! Just give up your sword! You are not a Knight! Why don't you just go home and milk some cows?
Mildain: You know, you should really be worried about yourself before you start worrying about me. Otherwise your face will get so ugly that you won't be able to attract the bitches in Hell!

Guildus: You look familiar... Where have I seen you...? That's odd. How can I forget such an ugly face? Or was that your ass I saw?
Barbas: The Knight from Zenobia! You really are a fool!!
Guildus: Where is that clown-like friend of yours?
Barbas: Martym?! You know Martym? Now I remember...you're the Knight who begged for mercy when you got hit by Martym!
Guildus: You haven't changed a bit! You make things sound so dramatic!

(when you get Barbas' HP down far enough)

Barbas: Uhh...you're starting to scare me! I have to come up with an excuse...and quick... (escapes)
Denim: Wait, Barbas!

Denim and his forces make their way inside the castle. Lans is shocked to see that Barbas was defeated, and tells Kachua that they are going to Heigm. Kachua refuses to go, saying that she is sick and tired of running away. Depending on your luck (and previous responses), Kachua will either run into another room (and away from the battle) or to another place in the room. Denim and his troops enter the room.

Denim: Kachua!!


Lans
Death Templar

Kachua
Dark Priest
Battle 45: Inside Banisha

Objective: Kill the leader!
Leader: Lans
Enemies: Kachua (drops Red Necklace), 8 Templar Knights
Union: Dark Knight Roslolian

Notes:
  • Make sure your Attack Team is balanced with direct attackers, magicians, indirect attackers, and supporting characters. Lans is arguably the strongest character in the entire game, and could probably defeat your entire team in direct hand-to-hand combat. If you went to Hell Gate and got Fudo, you'll have a tremendous advantage. Try to avoid staying around Lans too long because he has a special attack called Oracle, which will damage your characters and lower their maximum HP.

  • Of the enemy Templar Knights, 2 will drop Cure++, two will drop Magi++, and two will drop Escape Jewels. Try to get these if you want, but be sure to stay away from Kachua if she is in the battle--she only has direct attacks, and you'll probably kill her in 1-3 hits. If she dies, the battle will automatically end.

  • One of the Templar Knights has Exorcism, so if using undead characters is part of your strategy, keep them away from him until you can take him out!


Denim: Kachua! They're using you! Their purpose is to get the treasure of the late King Dolgare! They need a direct descendant of King Dolgare to get the treasure! That's all they need you for! They don't care about Valeria! They just want the treasure!
Lans: Don't listen to him, Kachua! How many times have you been betrayed by your foster father, blood father, and by him?! Remember! He, who was your most trusted brother, has betrayed you!
Kachua: I don't care if I'm used or not! At least I feel needed! They gave me attention! Denim...how about you? Do you need me?

(when you get Lans' HP down far enough) Lans: I guess this is it...I have no choice!
Kachua: Wait! Please don't leave me!! (Lans escapes) ......What the!

Inside another room of the castle, Denim talks to Kachua. She asks him what he will do with her, and he tells her that he came to save her. She says the name Kachua has no meaning for her, but Denim reminds her that she is his one and only sister. She asks him why he abandoned her, and he can say:
Denim:1. I didn't.
2. I did, once.

Choosing (1) will cause Kachua to take out a knife and stab herself, and she will die. If you choose (2), Denim will say that he did not want to endanger her by putting her into battle. She will say that he is lying, and that he just got tired of her. In response, Denim can say:
Denim:1. I love you!
2. Come with me!

If Kachua was in the battle, choose (1); if not, choose (2). Otherwise, she will stab herself with a knife and die. Assuming that you say the right things to keep her alive, she will fall into Denim's arms and cry. Denim will apologize, and promise never to abandon her again.

Join up!

Kachua
Princess

Somewhere in the Boulder Desert, Lans Tartare berates Barbas for his failure to defeat Denim and his cowardice in running away. Barbas has nothing to say, and Lans takes his Templar Knights and heads for Heigm.


Scene 51: Fiduc Castle

After successfully driving the Dark Knights out of Banisha Castle, Denim returns to Fiduc Castle to meet with Moruba.

If Kachua is dead, he will be in a state of mourning, unsure of whether it is worth it or not to continue fighting. Moruba will ask everyone else in the conference room to leave, and he will ask Denim to calm down. He says that since they were unable to save Kachua, they will blame her death on the Dark Knights, since it was them that pushed her over the edge. Denim disagrees and claims responsibility for her death, but Moruba tells Denim to stop being so weak--he has a mission to end the war in Valeria, and he has to put his feelings aside and do what he has to do. Moruba says that the Bacrum Army is making their move, and that he will prepare the troops for battle. Denim needs to get over Kachua's death for the time being, because the Liberation Army needs him. At this time, Denim will have the opportunity to change his class to "Lord."

If Kachua survived the events at Banisha, she will head the meeting at Fiduc. As she begins making plans to launch the final attack on Heigm, Moruba tells Kachua that it would be best for her to stay behind in Fiduc; however, she refuses to do this. Kachua says that she will join Denim on the front line of combat, to prove that she is a true leader. She tells Moruba not to worry, and Denim gives the order to prepare the troops for battle. Everyone leaves except for Denim, Moruba, and Kachua. Kachua asks the other two how she was during the meeting, and they both tell her that she did just fine. Denim tells Kachua that he still thinks that she should stay behind, but she reminds him that she said she wouldn't do that. She asks Denim if he would help her if she was in danger, and he says yes. Moruba says that King Dolgare also loved to be in the front lines--perhaps it is in the blood. Kachua says that the King's spirit will protect her, and Denim asks her to promise him that she won't do anything crazy. She promises to be careful, and with that the final campaign against Heigm begins!


Scene Iota: Grimby City

Required Conditions: After making plans to attack Heigm, go into the Miscellaneous Section of the Warren Report and read "Ramzen Wreckage."

(in the city centre, a man is surrounded by the Dark Knights)

Martym: Why don't you just tell me where the damn thing is!
Rendal: I'm trying to tell you, a thief stole it! I honestly don't know where it is!
Martym: Do you really think I'm that stupid?! Where is it?!
Rendal: I swear, we really don't know! We have no intention of fighting against you, either!
(Martym turns around at looks up to the sky)
Martym: Dear God almighty! This bastard is lying! They have stolen our precious treasure. Lord have mercy on these pathetic souls! Oh, are you telling me to pass judgment on him? I shall obey my lord, I will pass judgment on him on your behalf!! (turns back to Rendal) Kill him!
(Denim and his troops arrive)
Denim: Wait, Martym!! Leave him alone!
Martym: Oh, no. Here comes Mr. Hero. I never have any fun.
Rendal: Help me!
Martym: I've had enough! You are going to Hell for that, kid!!


Martym
Temple Commando
Battle Iota: Grimby City

Objective: Kill the leader!
Leader: Martym
Enemies: 6 Templar Knights
Union: Dark Knight Roslolian
Guests: Rendal
Notes:
  • As a Gunner, Rendal's INT isn't that high. But for some reason, he is the smartest Guest in the entire game! Realizing that he has no chance against Martym in hand-to-hand combat, Rendal runs toward your party. Saving him is pretty easy!

  • Given that, you should kill the Templar Knights to get their treasure. In particular, one has the Granite Sword , one has the Ice Sword, and one has the Comet Whip.

(when Martym is at critical HP)

Martym: Remember, boy! Someday I will pay you back!! (escapes)

Inside a house, Rendal thanks Denim for saving him. Denim asks him what Martym was up to, and Rendal asks Denim if he has ever heard of a "gun." Denim mentions the gun that Barbas pulled out in the battle at Banisha Castle, and Rendal tells him that another one was found on a wrecked ship. The salvage of the ship was under the supervision of the Dark Knights, whose sole purpose was to get the gun. When the gun was stolen by a thief, Rendal was blamed for its disappearance. Denim says he understands, and Rendal asks Denim to let him join the Liberation Army. It is not safe for Rendal to stay in Grimby City anymore, since the Dark Knights could come back at any time. Furthermore, the last thing the Roslolians want is for Rendal, a man who knows the workings of guns, to join the Liberation Army. Denim welcomes Rendal to the Liberation Army, and says that they will fight together for the future of Valeria.

Join up!

Rendal
Gunner

Note: Now that Rendal has joined your party, the "Gunner" class is now available on the Class Change Screen.


Scene Xi: Nimuraba Forest

Required Conditions: After recruiting Rendal at Grimby City, go into the Miscellaneous Section of the Warren Report and read "Thief in Nimuraba."

Ganb: You are the kid that I saw before!! Why are you here?!
Denim: I never thought I'd meet you again. I didn't know that you were the thief of Grimby.
Ganb: I lost my precious friends...all because of you! (summons Belda Jr and Obda Jr) Let's go guys! Come out! It's time to fight! (calls Lizard Men and Hawk Men) (to Denim) This will be your grave!!


Ganb
Beast Tamer

Belda Jr
Gryphon

Obda Jr
Gryphon
Battle Xi: Nimuraba Forest

Objective: Kill the leader!
Leader: Ganb
Enemies: Belda Jr, Obda Jr, 4 Lizard Men, 2 Hawk Men
Union: Thief
Notes:
  • Do not attack Belda Jr or Obda Jr--just go for Ganb. Get his HP below 20, and you will be able to recruit him and his pets. If you kill one of the two Gryphons, you'll miss your chance to end this battle on good terms! Plus, if you recruit Ganb, he comes with the Rifle, the most powerful gun in the game!

(if you get Ganb to critical HP without killing one of his Gryphons)

Ganb: Sorry Junior... I think I'm dying... Denim of Griate, I will surrender to you. You can torture me, kill me, hang me...! But please don't kill my kids! They're innocent! I'm the bad guy! I deserve to die! But please don't kill my kids!
Denim: Do you speak the truth, Ganb?!
Ganb: I'm a man of my word!
Denim: ...Very well. You have a good master, Junior! Ganb, you will be a member of the Liberation Army now! You are very compassionate toward your animals.
Ganb: What?! You are making me a member??? Ha, ha, ha! You're funny! I tried to kill you once! How can you accept a person that tried to murder you?
Denim: You are also a victimof the war! You were merely being used by the Cardinal! But from now on, you have to think and choose how to use your ability.
Ganb: You're treating me like an ordinary man...? ...Thank you.


Join up!

Ganb
Beast Master
Join up!

Belda Jr
Gryphon


Join up!

Obda Jr
Gryphon


Scene Eta: Coritani Castle

Required Conditions: After making the plans to attack Heigm, go to Coritani Castle.

Denim finds Moruba at Coritani Castle. He asks Moruba about the Forbidden Power, and at first Moruba tells Denim that he does not know anything about it. Denim says that they need a powerful weapon to defeat the Dark Knights, and that the Forbidden Power may be just what they need. Moruba asks Denim if he knows why it is called the Forbidden Power, and then goes on to tell the story about how King Roderick of Brigantes originally used it to defeat his enemies in the Unity War. He wiped out his enemies, but he also wiped out most of his own men in the process. It came to the point where he would use the Forbidden Power whenever there was a problem, and the people lost faith in him. Eventually, Dolgare Overis defeated Roderick in an epic battle at Fort Kadoriga and sealed the Forbidden Power away permanently so that its power would not be abused again.

Moruba then asks Denim if he thinks that he will be able to use the power without abusing it.

Denim:1. I'm not sure.
2. I think I can.


If you choose (1), Moruba will assure Denim that he does not need more power than he can handle, and that there are a number of people who still remember the threat that the Forbidden Power poses. Denim will say that Moruba is right, and that he won't think about it anymore.

If you choose (2), Moruba will tell Denim that there are five different types of Forbidden Power-- Fire, Earth, Water , Wind, and Shadow . He says that he knows nothing about the Shadow type. The other four types however, are sealed away in shrines throughout Valeria. In order to break the seals, one needs a "psychic medium," which must be the direct descendant of a High Priest. Denim confirms that Moruba's daughters are these psychic mediums, and Moruba tells Denim to bring his daughters to Banhamuba Shrine, where he will perform the ritual to assign them as psychic mediums. Bring them there, and each of the Foriner Sisters will have the opportunity to change their class to "Shaman."


Scene Psi: Fort Damsa

Required Conditions: During Scene Eta, tell Moruba that you think you can handle the Forbidden Power. Then, bring his daughters to Banhamuba to be assigned as psychic mediums--in particular, you need to have Sisteena in your party.

(outside the fort)

Anchen: Denim of Griate, how dare you kill our leader!


Anchen
Sword Master
Battle Psi1: Fort Damsa

Objective: Kill the leader!
Leader: Anchen (drops Thunder Shield)
Enemies: 1 Exorcist, 2 Valkyries, 2 Archers, 1 Siren, 1 Witch, 1 Cleric
Union: Defeated Soldier
Notes:
  • As a quick note, the enemy Exorcist has Exorcism.

Anchen: Gargastan people...this is the time...we should commit suicide...


To get to the second battle, you need to leave Fort Damsa and return there. Sisteena will automatically open the sealed room.

(inside the sealed room of Fort Damsa)

Battle Psi2: Hahnela's Temple

Objective: Kill all enemies!
Enemies: 1 Obinick, 2 Thunder Dragons, 2 Golems
Union: Unknown
Notes:
  • The Obinick will drop Air Cry when defeated, and one of the Golems has a WindOrb.


Scene Phi: Fort Bodo

Required Conditions: During Scene Eta, tell Moruba that you think you can handle the Forbidden Power. Then, bring his daughters to Banhamuba to be assigned as psychic mediums--in particular, you need to have Selye in your party.

(outside the fort)

Robos: Who are you? What do you want? Whoever you are, you will not leave alive! No one should know where Robos' hideout is.


Robos
Berzerker
Battle Phi1: Fort Bodo

Objective: Kill the leader!
Leader: Robos (drops Flame Shield)
Enemies: 4 Hawk Men, 2 Cockatrices
Union: Pirate
Notes:
  • One of the enemy Hawk Men has a FireOrb .

Robos: I didn't know...it was the Liberation Army... I was supposed to go on vacation next week...


To get to the second battle, you need to leave Fort Bodo and return there. Selye will automatically open the sealed room.

(inside the sealed room of Fort Bodo)

Battle Phi2: Zoshonell's Temple

Objective: Kill all enemies!
Enemies: 1 Fire Brass, 2 Phoenixes, 2 Fire Drakes
Union: Unknown
Notes:
  • Out of the four battles for the Forbidden Magic, this is easily the most difficult. The Fire Brass and Phoenixes can use the powerful attack Crimson, which can cause serious damage to your party members. Also, be weary of the fact that the Fire Brass has a FireOrb, and will most likely use it against your team, causing big damage. If you've made a trip or two through Hell Gate, Mute will be of tremendous help to you! For your efforts, the Fire Brass will drop Nova+ when defeated.


Scene Upsilon: Fort Gerdo

Required Conditions: During Scene Eta, tell Moruba that you think you can handle the Forbidden Power. Then, bring his daughters to Banhamuba to be assigned as psychic mediums--in particular, you need to have Olivia in your party.

(outside the fort)

Anberg: ...What are you looking for? You better go back to where you came from or else! (to his troops) Kill them all!


Anberg
Lich
Battle Upsilon1: Fort Gerdo

Objective: Kill the leader!
Leader: Anberg (drops Ice Shield)
Enemies: 1 Skeleton, 2 Ghosts, 1 Knight Zombie, 1 Berzerker Zombie, 2 Wizard Zombies, 1 Archer Zombie
Union: Corpse
Notes:
  • One of the Wizard Zombies has the Holy Ring, and the other has the Undead Ring. However, it doesn't seem like there is any way to get these items from them...

  • Be careful, because Anberg has Fenril! Avoid sending a single attacker at him once he has enough MP to use it.

Anberg: I wasn't even supposed to be here!!!


To get to the second battle, you need to leave Fort Gerdo and return there. Olivia will automatically open the sealed room.

(inside the sealed room of Fort Gerdo)

Battle Upsilon2: Gurza's Temple

Objective: Kill all enemies!
Enemies: 1 Death Dragon, 2 Blue Dragons, 2 Gryphons
Union: Unknown
Notes:
  • The Death Dragon has a WaterOrb, and will probably use it to wreak havoc on your party. To try and avoid this, have Canopus or someone else who can fly get as close to the Death Dragon as possible, so that it will go for them instead of using the WaterOrb. It's risky, but hey--it might pay off! The Death Dragon will drop IceCloud when it is defeated.


Scene Pi: Fort Gekko

Required Conditions: During Scene Eta, tell Moruba that you think you can handle the Forbidden Power. Then, bring his daughters to Banhamuba to be assigned as psychic mediums--in particular, you need to have Shelley in your party.

(outside the fort)

Bavan: The leader of the Liberation Army is here to destroy us! (to his men) Kill them all! If we're caught, we'll be hanged!


Bavan
Berzerker
Battle Pi1: Fort Gekko

Objective: Kill the leader!
Leader: Bavan (drops Earth Shield)
Enemies: 4 Ninjas, 1 Wizard, 1 Warlock, 1 Cleric
Union: Pirate

Bavan: What a shame...to die on land...


To get to the second battle, you need to leave Fort Gekko and return there. Shelley will automatically open the sealed room.

(inside the sealed room of Fort Gekko)

Battle Pi2: Bartha's Temple

Objective: Kill all enemies!
Enemies: 1 Gargoyle, 2 Earth Dragons, 2 Cockatrices
Union: Unknown
Notes:
  • The Gargoyle will drop Quake when defeated, and has an EarthOrb to use against your party.


Scene 52: Yomlahaba Ravine

Stanoska: You traitor! I will not allow you to move an inch closer!


Stanoska
Beast Tamer
Battle 46: Yomlahaba Ravine

Objective: Kill the leader!
Leader: Stanoska (drops Float Ring)
Enemies: 1 Witch, 2 Valkyries, 1 Hawk Man, 1 Lizard Man, 3 Octopuses
Union: Bacrum Valeria Country
Notes:
  • This level is hard to get around in unless your team members can walk on or in water. You can, however, use the landscape to your advantage. Bring along any flyers like Canopus, and have Denim either equip an item that allows him to fly or warp, or bring someone along with either Teleport or Jump. With the exception of the Valkyries and their FireBurn spells, no one will be able to hurt you!

Stanoska: Why don't you...work for your...own nation...


Scene 53: William City

Hanzo: I see, so you are Denim, the Hero of Griate! You are a pretty handsome fellow, aren't you? Let the Purple Holy Knights challenge you.


Hanzo
Sword Master
Battle 47: William City

Objective: Kill the leader!
Leader: Hanzo
Enemies: 5 Knights, 2 Dragoons, 1 Exorcist, 1 Cleric
Union: Bacrum Valeria Country
Notes:
  • The Exorcist has Exorcism, so keep your undead away!

  • The Dragoons have Fire Swords, in case you feel like persuading the Dragoons to get them. Furthermore, three of the Knights (the ones without bows) have Wing Shoes.

  • With all of the persuasion you may want to do, you'll find that Hanzo doesn't make it easy for you. Like most Sword Master enemy leaders, he'll rush in to attack you, most likely being killed by 2-3 of your counterattacks. A clever way to eliminate this hassle is to use the landscape against him. There are a few select points on the map where you can "trap" him. For example, look at the map of William City:


    Right next to the hidden treasure location marked "B" you'll find a tiny ledge surrounded by bushes. Lure Hanzo over there and have one of your weaker attackers jump in that area. Use Teleport to get your character out of there, and have someone stand in front of the "bottom bush" (the one that is one tile north of "B"). As another example, look at the area marked "A." Due west is a small ledge that is isolated from all of the adjacent tiles. Lure Hanzo over there so that he is adjacent to that ledge, and then use one of your characters with a shield to knock him onto the ledge. He's helpless! Now you are free to persuade the other enemies that you want to persuade.

Hanzo: I can't believe I lost... I see the light!! Argh!


Scene Chi: Fiduc Castle

Required Conditions: Kachua must survive the events at Banisha Castle, and make plans to attack Heigm. Have her die in battle before you go to Heigm, and then return to Fiduc Castle.

Back at Fiduc Castle, Moruba is disappointed that Kachua died. He says that they should never have let her leave Fiduc Castle despite what she said. Denim blames himself, saying that he promised to protect her, but failed. Suddenly, a soldier enters the room with a report. Apparently the Liberation Army's troops in the Boulder Desert have been completely defeated!! The details are not yet known, but the survivors said that the enemies used sticks that made loud sounds against the troops, which made them fall. Denim realizes that it must have been a gun, and says that he will bring his troops to the Boulder Desert to investigate. Before leaving, you have the chance to change Denim's class to "Lord."


Scene Omega: Boulder Desert

Required Conditions: After completing Scene Chi, Boulder Desert will now be on the map. Go there before you go to Heigm.

Felion: Bow in front of my gun, you pathetic fools! I will show you that this Commander Gun made in Barubauda is more powerful than any magic!


Felion
Gunner
Battle Omega: Boulder Desert

Objective: Kill the leader!
Leader: Felion (drops Shotgun)
Enemies: 4 Terror Knights, 4 Ninjas
Union: Bacrum Valeria Country
Notes:
  • As a Gunner with a gun, Felion has infinite attack range. He could become annoying for you unless you use the obstacles in the level to your advantage--he can't shoot you through them!

Felion: ...How can I be killed...by these...barbarians...?


Scene 54: Heigm Castle

At this point, you have the option of going to either Rear Heigm or Entrance Heigm.

(Rear Heigm, outside of the castle)

Halphas: (to her troops) Don't let them get into the castle! We have to stop them here!


Halphas
Dragon Tamer
Battle 48(r): Rear Heigm

Objective: Kill the leader!
Leader: Halphas (drops Ice Axe)
Enemies: 2 Knights, 2 Wizards, 2 Archers, 1 Cleric, 2 Holy Dragons
Union: Bacrum Valeria Country
Notes:
  • One of the Knights has the Stone of Dragos . You'll have to persuade him to get it if you want it--you can have one of your Dragons equip it to boost their power.

Halphas: Your highness...forgive me...!


(Entrance Heigm, outside of the castle)

Lauau: You have guts, attacking us from the front! However, this will be the end of you!


Lauau
Terror Knight
Battle 48(e): South Brigantes

Objective: Kill the leader!
Leader: Lauau (drops Flame Mace)
Enemies: 2 Berzerkers, 3 Archers, 1 Siren, 1 Witch, 1 Cleric, 1 Tiamat
Union: Bacrum Valeria Country
Notes:
  • One of the Berzerkers has the Stone of Dragos , in case you feel like persuading him to get it. It'll boost the power of your Dragons, if you have any!

Lauau: I can't feel my legs! Is this the end..?

In the throne room of Heigm Castle, a soldier delivers the news that the Liberation Army has broken through the castle gates. Branta says that this whole situation has become a complete mess, and blames the Dark Knights for the problems they are now facing. As he tells his men to prepare for battle, Lans Tartare, Balzepho, Volac, Barbas, Martym, and Andoras enter the throne room.

Branta tells them that if they don't want to be the laughing stock of the entire island, they'd better get out there and fight. Lans tells Branta that they did not come to fight--they came to say goodbye. Branta is shocked by this, and asks if they are abandoning him; Lans tells him to choose his words carefully, because if he had obeyed them and given the throne up to Kachua, he would not be in this mess now. Branta asks Lans if that is his best excuse, but Lans asks Branta if he understands that it is over--he has lost the war. Branta says that he has not been defeated yet--Lans is the loser!

At this time, Barbas pulls out a sword and points it at Lans. Martym does the same to Balzepho, and Andoras does it to Volac. Lans asks Barbas if he has gone mad, and Barbas replies by saying that Tartare's era is over. Branta orders Lans, Balzepho, and Volac to be taken away, and they are...

On to the second battle at Heigm Castle. If you chose to go to Rear Heigm, you will go on to South Heigm. If you went to Entrance Heigm, you will go on to Heigm Courtyard.

(South Heigm, outside of the castle)

Velmado: (to his troops) The Liberation Army is strong. We might lose! I will not force you to fight. Whoever does not want to die may leave now! (no one moves) Go ahead! Now! (still, no one moves) Very good! The Bacrum Knights are honorable. (Denim and his troops arrive)
Velmado: We will protect this castle! Show them what the Bacrum Knights are made of!


Velmado
Knight
Battle 49(r): South Heigm

Objective: Kill the leader!
Leader: Velmado (drops Phalanx Hammer)
Enemies: 1 Sword Master, 1 Warlock, 2 Archers, 2 Dragon Tamers, 1 Siren, 2 Tiamats
Union: Bacrum Valeria Country
Notes:
  • The Sword Master has two Fire Swords. You just might want to persuade him if you can!

Velmado: Glory to the Bacrum Knights...!


(Heigm Courtyard, outside of the castle)

Grande: Bastards! I will not allow your selfish acts to go unpunished!


Grande
Knight
Battle 49(e): Heigm Courtyard

Objective: Kill the leader!
Leader: Grande (drops Cat Claw)
Enemies: 3 Ninjas, 1 Wizard, 1 Warlock, 1 Exorcist, 2 Archers, 1 Golem
Union: Bacrum Valeria Country
Notes:
  • Just as a warning, the Exorcist has Exorcism.
Grande: Oh, the agony, agony of it all...

We go to another room inside Heigm Castle, where Martym and Andoras have Lans Tartare, Balzepho, and Volac tied up. Martym pulls a sword away from Balzepho, saying that he has betrayed Lodis. Volac is surprised by this, and Martym says that they have had the key to the magic seal all along--the Holy Sword, Brunhild. They did not need to look for a dead woman and a whiny queen--they could have used the Brunhild to break the seal on Dolgare's treasure. Volac asks if what Martym says is true, and Martym says that he will not let them keep Dolgare's treasure all to themselves. Balzepho asks Martym if he is threatening them, and in response Martym kicks Balzepho. He says that he will not kill them, but he cannot guarantee that the Liberation Army will not once they take over the castle. With that, Martym leaves the room. Volac asks Balzepho if he is all right, and then asks Andoras if he is also betraying them. Andoras says that they will pay for what happened to his father, mother, and brothers. Volac asks Andoras if he is still holding a grudge over what they did to the Nirdum Royal Family, but Andoras doesn't reply and leaves. Lans tells Volac and Balzepho not to bother with them, since they won't be able to handle the treasure anyway.

(inside the throne room of Heigm Castle)

Barbas: (to Martym) So?
Martym: The old fart Balzepho had it! (Andoras enters)
Andoras: Things are gettting wrong...
Branta: They're here! Do something!
Barbas: (to Martym) We'll go to the Eden, as we had planned.
Branta: What are you guys up to?!
Barbas: Are you telling us what to do, you imbecile?
Branta: What?! How dare you talk to me like that!!
(Denim and his troops arrive)
Denim: Branta! This is the end!!
Martym: Damn, they're already here! (escapes, along with Andoras)
Branta: Are you running away?!
Barbas: We're done listening to you. Your time is over. You were the one who started this war. It's your problem now! We're not going to stick around and clean up! (Barbas escapes)
Denim: Wait, Barbas!


Branta
Bishop
Battle 50: Heigm

Objective: Kill the leader!
Leader: Branta (drops Penetant)
Enemies: 6 Terror Knights, 2 Sirens
Union: Bacrum Valeria Country
Notes:
  • Branta has Exorcism, so it'd be best to leave your undead characters out of this one!

  • In this battle we discover that not only does the Terror Knight's terror effect make a difference, it makes an increasingly greater difference as you have more and more Terror Knights in the same area. If there's one thing you don't want to do, it is rush in with your fighters and try to beat the Terror Knights in hand-to-hand combat. If you're on the same level as they are, even the White Knights stand no chance against them. Therefore, it is strongly recommended that you bring Haborym or someone else with Petrify to stop them in their tracks. Do note, however, that Branta will cure their petrification with Vitalize, so you need to work fast!

  • After you start killing the enemies, Branta will start summoning Angel Knights to fight against you. Feel free to persuade any that you want!


Branta: Denim! My nephew! It's not too late! Bow to me and let us rule Valeria together as uncle and nephew!
Denim: You will be the one to bow your head to me, Branta! If you call off your troops and put down your sword, then I will spare your life. If you resist, I'll kill you!
Branta: Look! The Dark Knights have already left! I was merely doing what they were telling me to do. Yes. I lowered myself to become their puppet to save Valeria! When we lost King Dolgare, Lodis intervened in Valeria and nobody was ready to stop them! If we declared war against them,we would have all been killed! I just did what I had to do to protect the people of Valeria! Please, believe me!
Denim: Then why didn't you tell the King that the Queen was alive? Why did you keep silent when the prince passed away?! You were just using the King, my father, and even Kachua for your own selfish desires.
Branta: So what! A commoner like me can't gain power by living by his beliefs. Sometimes you have to deceive people! Denim, the world is not a fair place. People are unequal from the day that they are born! ...But complaining about my family background won't change anything. I would rather fight! I will fight to achieve everything I want! Didn't you get to where you're at by fighting? Your status is based on blood and sacrifice! How can you blame me for what I did?

Branta: Why...why...this can't happen...


Scene 55: Heigm Castle

After the large battle that just took place, a meeting takes place in the conference room of Heigm Castle.

If Kachua is dead, Denim leads the meeting. He tells the officers in the room that the Dark Knights are the enemy--no one else. The Liberation Army and the Bacrum Army need to work together from now on, and conflict between the two groups will not be tolerated. A Bacrumese Warlock tells Denim about a situation occurring in the capital. Some soldiers in the Liberation Army have been stealing money and goods from stores and raping innocent women. Moruba acknowledges that some soldiers joined the Liberation Army to gain wealth and power, rather than to bring peace to Valeria. It's the harsh reality of the situation. The Warlock asks Denim what he will do about the problem, and the possible responses are:

Denim:1. Ignore it.
2. We'll get them.

Your decision here will not have a huge impact on the game, but it will affect your Chaos Frame with the Bacrumese race. Choosing the first will cause it to drop, while choosing the second will cause it to rise. Afterward, Denim emphasizes that they are not Bacrumese nor Walstanian--they are Valerian. He urges the soldiers to unite as Valeria and build a country that is free from war and oppression. Denim declares that his forces will attack Eden, where the Dark Knights have fled to. Prepare for the last battle!

If Kachua is alive however, she is the leader of the meeting. She says virtually the same things as Denim does, except the Warlock does not bring up the problems in the capital. Kachua declares the final battle, and the meeting is adjourned.

Whether Kachua is alive or not, Denim will meet up with his spy Shadow, who has discovered the location of Lans Hamilton. They go to an old church in Heigm. In a back room, Denim discovers a man staring out the window that resembles Lans. He is being taken care of by a young girl, but seems to be in a state of shock. Denim finds Lans' music box on a nearby table and opens it--the music causes Lans to fall out of his chair. If Kachua is there, she will run out of the room, unable to bear the sight. The young girl apologizes to Denim and brings him a sword that she says the man was holding. It's the Zenobia Sword...


Scene Lambda: Krizar

Required Conditions: After liberating Heigm, go into the Warren Report and read "Double Agent" in the Miscellaneous Section. Then, go to Krizar.

It's a stormy day in Krizar, and we find Haborym and Denim in a house somewhere in town. Apparently Haborym asked Denim to come and meet him in the house, and Haborym asks Denim if he has heard of a "double agent." Denim says that he does not doubt Haborym. Haborym assures Denim that he is not the spy, but tells him that he used to be a member of the Roslolians. Denim is shocked by this, but is even more shocked when Haborym tells him that his real last name is Van Rams--in other words, he is the brother of Dark Knight Balzepho! Denim steps back a bit, asking Haborym if he is really a spy. Haborym says that he is not, and he is in Valeria to kill his brother Balzepho. Denim is not sure what Haborym means, and Haborym reveals that Balzepho killed their parents. We go to a flashback...

In the Van Rams household, we see Balzepho, Haborym, and Major Volgras, their father, in a hallway. Balzepho and Volgras have gotten into an argument because Balzepho wants Volgras to support the Roslolians, but Volgras does not want to give them any more authority. Balzepho asks his father when he became a puppet of the nobles, and tells him that he is disgracing the Van Rams name. Volgras tells Balzepho that he is the disgrace, as he was ordered to spy on the Roslolians, but has instead become a puppet of the Lodis King. Volgras tells Balzepho that he is no longer the heir, and has lost the right to be next in line. He tells Haborym to come with him--as they are leaving, Balzepho attacks Volgras from behind, killing him. Haborym is shocked that Balzepho would do such as thing to his own father. Some Dark Knights enter the house, and Balzepho tells Haborym that the committee that Volgras was on is the downfall of Lodis. In other words, Major Volgras was part of the "virus." Haborym says that Balzepho is crazy, and that no one will go along with his crazy ideas. Balzepho retorts by saying that the people already support the Roslolians, and that Haborym should just shut up and follow him. Haborym refuses to do so, and Balzepho says that he never thought he would be so stubborn.

Back in the present, Haborym continues the story. Shortly after the end of the flashback, the Lodis King's supporters gained control of the Senior Committee, executing its former members. Haborym was then caught, blinded, and exiled from Lodis as the killer of his own father. He then goes on to say that about a month later, he heard that his mother had died as well. Though it was reported to have been an accident, Haborym learned that she was actually poisoned because she was being "difficult." Denim asks Haborym if he came to Valeria for revenge, and Haborym says yes. Denim then tells Haborym that he heard about Barbas betraying Lans, Balzepho, and Volac, and that they had been arrested somewhere in Heigm Castle. However, they had already escaped by the time Heigm Castle was liberated. Denim says that he believes that the three of them have already left Valeria. Haborym then says that revenge is not the only reason he is in Valeria. He sincerely wants to be a part of Denim's Army. He loves his own country, but the supporters of the Lodis King ruined it--he does not want Valeria to follow the same path as Lodis. Haborym says that he is proud to be able to participate in Valeria's revolution.

Denim walks over to Haborym, and thanks him for telling him everything. He says that he has never doubted Haborym, and Haborym thanks him for his trust.


Scene 56: Eden

Our next scene takes place in Eden, the huge tower built by King Dolgare.
Rather than covering it here, the entire tower of Eden is covered in great detail in the
Eden Guide.


Scene 57: Beyond Eden

After defeating Andoras the Dark Knight on the top floor of Eden, Denim finds out that Barbas and Martym are underneath the tower, attempting to open up the grave of King Dolgare. Denim and his comrades follow them underground, but are stopped at the entrance to Dolgare's Tomb by a group of zombies.

Battle 51: Underground Tomb Entrance

Objective: Kill all enemies!
Enemies: 1 Knight Zombie, 1 Berzerker Zombie, 1 Wizard Zombie, 1 Amazon Zombie, 1 Archer Zombie, 1 Death Hydra, 2 Death Giants
Union: Corpse
Notes:
  • This battle will be quite easy if you made it to floor B25 of Hell Gate and got Starion. Otherwise, it'll be slightly harder...

Beyond the tomb's entrance is a set of ancient ruins. As Denim approaches them, he sees Martym and Barbas trying to open the seal to Dolgare's Tomb.

Martym: Hurry up, Barbas! They'll be coming any minute!
Barbas: Relax! It seems that there are different seals.
Martym: Barbas, we are the only ones left! I don't want to set off any traps!
Barbas: Shut up, before I beat the living crap out of you!
Martym: Shit! (Denim and his troops arrive) Damn!
Denim: Barbas, Martym! There's no escape for you now!
Martym: Damn it!! He killed Andoras!
Barbas: This is it! This is the spell to break the seal!
Martym: Hurry up, Barbas! They're here!
Barbas: (holding the Brunhild overhead) Belrowda Onnu Barinda Fyzanla Lenne Filaha... Now your lord Filaha will allow you to break the seal!
(with a flash, the seal is broken)
Barbas: Good! (enters the tomb)
Martym: (to the Roslolian troops) Stop them! (enters the tomb)
Denim: Wait, Barbas!

Battle 52: Ancient Ruins

Objective: Kill all enemies!
Enemies: 6 Templar Knights
Union: Dark Knight Roslolian
Notes:
  • This battle is pretty straightforward. One of the Templar Knights has Barbas' Earth Hammer, and will drop it when defeated.

Inside Dolgare's Tomb, Denim finds Barbas and Martym trying to obtain Dolgare's treasure.

Barbas: I am the owner of the Holy Sword Brunhild which was given by a Holy Angel. In the name of the Holy Gods...let the seal be broken where the cursed demons are imprisoned! (in a flash, the seal is broken)
Martym: That's it? Nothing is happening.
Barbas: You're right.
Denim: That's it!
Martym: He just won't give up, will he?
Barbas: Welcome, Denim! What do you think of Dolgare's treasure?
Denim: Treasure?
Barbas: You don't know...? Then I will tell you... A long time ago, there was once a man who visited here...
Denim: Long time ago?
Barbas: The man was a courageous warrior. And he got everything. But even with that power, he couldn't do one thing, "Resurrection." One day, the man lost his beloved son in an incident. Followed by his wife... He desperately prayed to the Gods to get his son and wife back. But his prayers were never answered. The man became angry and lost faith in the Gods. He decided to use the demons' power instead... So his journey into the dark world began. To the world where demons reside. Do you know the legend of the Ogre Battle?
Denim: Ogre Battle...? It's about the epic battle between humans and ogres which occurred in a time of legend.
Barbas: That's right. Long ago, humans and ogres fought over the earth. The humans asked the Gods to support them and the ogres asked the demons...
Denim: What about it?
Barbas: Do you know what happened?
Denim: ...The humans won and the ogres were sent to the underworld... Every kid knows that fairy tale!
Barbas: Ha, ha, ha, ha.
Denim: What's so funny?!
Barbas: What would you say if I was telling the truth?
Denim: Truth?
Barbas: The place where you are standing right now is the gate to the Dark World. This is a Chaos Gate!
Denim: !!
Barbas: ...And the man who went to the Dark World was Dolgare! Yes, the man you guys respect so much. The former King Dolgare himself!
(the ground shakes)
Martym: The Chaos Gate is moving.
Barbas: Come on! Let's go into the underworld and get the Forbidden Power.
Denim: Oh, no! I won't let you.
Barbas: Sure, we all don't have to go. Because you guys will die here!!


Barbas
Temple Commando

Martym
Temple Commando
Battle 53: Sealed Room

Objective: Kill the leaders!
Leaders: Barbas (drops Brunhild), Martym (drops Nyfret )
Union: Dark Knight Roslolian

(if you kill Martym first)

Martym: What...Barbas...you...(dies)
Barbas: Stupid bastard!

Barbas: I was so close...so close...

(if you kill Barbas first)

Barbas: If it weren't for you stupid kids...I could...(dies)
Martym: Has the Chaos Gate opened, yet?!

Martym: I can't...die...how can I...

(the ground shakes)
Denim: The gate is opening?
(the ground shakes some more, and Dolgare appears)
Denim: ?!
Dolgare: I am Dolgare...the God of Valeria... Lower beings who belong on earth...get on your knees and show me respect...
Denim: You're a God...?
Dolgare: Give me the Brunhild...then I shall be able to return to earth...
Denim: I understand now...he's still bound to the Chaos Gate...
Dolgare: Everyone rejoice! I have returned...!
Denim: King Dolgare...! I shall release your soul and send you to where your son and wife await.

At this time, you will have one last chance to re-organize your troops before the final battle. Prepare your best team for battle!


Dolgare
Dark Element
Battle 54: Sealed Room

Objective: Kill the leader!
Leader: Dolgare
Enemies: 2 Dark Stalkers, 1 Dark Dragon, 1 Dark Eye, 1 Dark Wing
Union: Unknown

Notes:
  • One thing that you'll definitely want to do is take out Dolgare's dark creatures before attempting to attack him. Then, have your attackers focus on eliminating any new allies he summons while a few strong attackers (especially the one with Fudo) focus on attacking Dolgare himself. This way, Dolgare will spend his turns summoning allies instead of devastating your party with abilities such as Torutos, Kusogaki, Derupt, Pondors, and Umbra .

  • You will probably notice in battle that Dolgare has the ability to change his element. Upon further inspection, you'll also notice that he does not do this at random--you trigger his element change when you attack him with an elemental attack (weapons, magic, or techniques). Given this, you will want to have attacks of all elements available, if you choose to use them at all. This applies for the four Goddess' elements--Dolgare cannot change element to Shadow or Holy. However, he has extraordinary defense against Shadow attacks, while Holy attacks work quite well.

  • As a warning, do not try to use DevilCry or Agony against Dolgare. They don't work, and will put your characters at risk.

After being defeated, Dolgare disintegrates and the ground shakes once more.

Denim: Damn! The Chaos Gate is still opening!! Something has to be done, or we'll be pulled down into the underworld!!
Familiar Voice: By the power of the Wind Spirit, I shall take you to heaven!
(All of Denim's comrades are teleported away. Warren appears)
Denim: Warren?!
Warren: Gasp...this place is collapsing down... Once it collapses, the Chaos Gate should be buried...
Denim: Warren, stop! You can't do that in your condition!
Warren: Thank you, Denim... This is good-bye... By the power of the Wind Spirit, I shall take you high into heaven! (casts a spell)
Denim: Warren!!!

As Denim is teleported away, the ceiling of Dolgare's tomb collapses...


Endgame

Congratulations! You have made your way through the story of Tactics Ogre. This section will cover the various endings of the game. The three routes are combined in the ending--parts of the ending that are unique to a particular route will be color-coded as follows: Law, Neutral, Chaos.

Ending One: Kachua is Alive

If Kachua is alive at the end of the game, she will be crowned Queen of Valeria. She makes a speech to further unite the three races of Valeria. We are taken through two flashbacks. The first is back at Griate, when Denim and Kachua have a slight argument before leaving with the Zenobian Knights to liberate Amorika Castle in Chapter One. The second is of the scene in Banisha Castle where Denim is talking to Kachua after defeating Lans Tartare.

In another room of Heigm Castle, Vice thinks about Denim. We see a flashback of Scene Theta, where Denim apologizes to Vice for following the Duke's orders in Baramus before Vice sets off for the Swanzi Forest in Chapter Three. Back in the present, a soldier enters the room and tells Vice that everyone is waiting for him. Vice says that he will be right there...

Olivia leaves Heigm. As she is leaving, she recalls a scene where Moruba tells her to go after Denim, since she really wants to--she shouldn't stay for the sake of the Filaha Order.

Back in Griate, Denim visits his father's grave. He mentions the recent happenings with Kachua. He mentions that Canopus, Mildain, and Guildus are returning to Zenobia with the Brunhild.

Denim also mentions that everyone is going on their own path. You will see one of the following scenes, depending on which characters you have in your party.
  • Aloser, Forcas, and Byan are leaving Heigm to go to Aloser's hometown to start a school. Byan wants to get away from the city, Forcas wants to help the people, and Aloser is just homesick.

  • Oxyones and Jenounes head for Coritani to deal with some of the Cardinal's troops who are resisting the new movement. Oxyones has forgiven Jenounes, but he has yet to forgive himself...

  • Orias and Debordes go to Brigantes to stay with a priest who used to be Orias' teacher. Debordes is gaining his will back, little by little--he speaks and shakes Denim's hand.

  • Haborym makes plans to follow Lans Tartare and Balzepho back to Lodis. Denim expresses some initial concern about Haborym's safety, but Haborym assures him that he will not do anything stupid to get killed since his life has more meaning than ever. His thirst for revenge was quenched by the joy of accomplishment.

  • Due to there being peace in Valeria, Zapan can't make any more money as a bounty hunter. He decides to go to the continent despite an offer by Moruba to be the head of the national guard. While talking to Denim, he reveals that he seeks adventure, and he wants to help kids like Denim develop their talents. Denim and Zapan hug and share a tender moment!

  • Presance decides to take some children who are Walstanian back to Amorika because there is still discrimination against minorities in Heigm. Denim mentions that they have to build a world where such issues don't exist, but Presance says that Denim has done enough and that change takes time, but it is the will of the Gods.

At the grave of his father, Denim says that he wants to go and see Zenobia, the land Lans Hamilton protected. We see a flashback of the scene where Denim, Kachua, and Vice first meet the Zenobians, and another one of the scene where Denim talks to Lans just before going to Baramus for the first time. Denim bids his father farewell, and then leaves the grave.

Until the Hittites invade Valeria, Valeria flourishes for a thousand years as an independent country...

After the credits, there is a short scene where a ship is departing for Lodis. Lans Tartare, Balzepho, and Volac arrive to board it...


Ending Two: Kachua is Dead

If Kachua is dead, Denim will be crowned King of Valeria. In the meeting room of Heigm Castle, some officials discuss the prospect of peace between Bacrum and the Walsta Liberation Army. A soldier enters, saying that it is time to go to the main hall. However, Denim is nowhere to be found...

Moruba goes to look for Denim, but finds Selye and Sisteena instead. They give him a report that Viscount Gaunda, a supervisor in the Amorika region, was assassinated. They believe that the Barnam Tiger guerilla group may have been responsible. Moruba tells them to keep this event a secret.

Denim is alone outside Heigm Castle, thinking about Kachua. We see flashbacks of various scenes with Kachua. After the flashbacks, Moruba appears, and says that it is time to go to the main hall for the crowning ceremony. Denim says that he cannot be King, but Moruba insists that he is the man for the job.

Denim thinks of his father, and his dying words. We see a flashback of that scene in Brigantes Castle...

We see a number of views of various places in Valeria. And the war in Valeria was later called the war of Heigm...

After the credits, you will see one of two scenes:
  • If Denim does not have high Chaos Frame with all three of the Valerian races, he will be assassinated by a terrorist Knight with a gun. Since when do Knights know how to use guns?

  • If Denim has a high Chaos Frame with the Walstanian, Gargastan, and Bacrum races, there will be a scene in Zenobia where King Tristan meets with his friend and loyal subject, Gilbert. Gilbert informs Tristan that Lodis is poised to attack Valeria with a force of 200,000 troops. Tristan says that he feels sorry for Valeria and that King Denim has no luck...


Chris: And there you have it--the entire story of Tactics Ogre!! It's been one heck of a journey we've made, and I hope that this has been as enjoyable for you as it has been for me!

From here, you can go
back to the Valeria Page.

Chris: Bye for now! I'll see you soon, in Lodis!