Chapter One: Are you telling me to stain my hands?


Table of Contents

Introduction Scene 6: Gruborza Plains
Scene 1: Griate Scene 7: Rime
Scene 2: Amorika Castle Scene 8: Fiduc Castle
Scene 3: Tanmas Hill Scene 9: Amorika Castle
Scene 4: Krizar Scene 10: Bordo Lakeside
Scene Alpha: Fort Kadoriga Scene 11: Zodo Marsh
Scene 5: Amorika Castle Scene 12: Baramus


Introduction

There was an island called Valeria on the Obello Ocean... Valeria has flourished as a trade port. But there was a constant struggle between the various ethnic groups. Each of them was trying to rule the entire island. Then there was one man who put the everlasting war to an end. His name was Dolgare, and he later became King of the island. King Dolgare united the island. He encouraged mixed marriages and set up an official religion. He tried to avoid hatred or arguments between the different ethnic groups. For half a century, Valeria flourished under Dolgare's reign. But the seeds of war were not completely destroyed...

After his death, Bishop Branta, the leader of the Bacrumese, dominated the aristocrat class. With his help, they declared the independence of the capital city of Heigm. Branta also signed a secret treaty with Lodis, a major country to the north, and received military support. Thus, he established Bacrum-Valeria. Branta wanted to rule the entire island, but the Dark Knight Lans Tartare vetoed Branta's idea. Lans did not want to waste the manpower by having a useless war. Lans was the leader of the Dark Knight Order of Roslolian. The order was sent by Lodis to watch over Branta. Branta had to accept this and gave up the invasion.

Southern Valeria, the only remaining territory, was split by two groups. One was called Gargastan, a major ethnic group which covers 70% of the population in Southern Valeria. There was a major nationalist movement led by Cardinal Barbatos. They declared war against the Walstanians, the other ethnic group that lived in Southern Valeria. The Gargastans then massacred the Walstanians. Duke Ronway became the leader of Walsta and fought against the Gargastans. But half a year later, Walsta lost the war. Cardinal Barbatos established the Gargastan Kingdom and declared the termination of the internal dispute between Walsta. However, the oppression of Walstanians never ceased...

The remaining Walstanians resisted the Gargastan Kingdom's oppression. But even that movement subsided when Duke Ronway was captured and imprisoned. Most people were desperate and moved into a Walsta self-governing district that the Gargastans provided. Thus the national dispute in Valeria had settled down. Little did the people know that that was only a temporary peace...
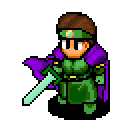


Scene 1: Griate

The game begins in the port town of Griate, where we are introduced to the following three characters:

Denim KachuaVice


They are preparing to attack Dark Knight Lans, who is rumored to be coming. While Vice and Denim are preparing to ambush him, Kachua expresses her doubts about the situation. Vice and Kachua begin to argue until Denim silences them. The Dark Knights have arrived, and it's time to attack--Vice and Kachua attack from the front while Denim prepares to strike from the rear.

Battle 1: Griate

Objective: Kill all enemies!
Enemies: Lans, Warren, Canopus, Guildus, Mildain
Guests: Kachua, Vice
Lans
Paladin
Warren
Lord Mancer
Canopus
Eagle Man
Guildus
White Knight
Mildain
White Knight

This battle does not last long--as soon as Vice gets to attack, he runs at Canopus and attacks. Canopus blocks the attack, and the battle ends as the five strangers reveal themselves to be Zenobians, not Dark Knights. Denim, Vice, Kachua, and their new friends go inside a building to discuss the current situation.

It turns out that Denim and Vice want to go to Amorika Castle to rescue Duke Ronway, but they lack the manpower to defeat the Gargastan soldiers that are stationed there. At first, Vice does not trust the Zenobians, but after they offer their assistance, he gladly accepts their help and the group of eight heads for Amorika to rescue Duke Ronway.


Scene 2: Amorika Castle

(at the castle's entrance)
Bapalu: You are the guerillas from Griate. Are you trying to rescue Ronway? Okay guys. These kids have a price on their heads! These guys are worth 2,000 Goth. They fell into our trap. Kill 'em all! (swings sword)


Bapalu
Berzerker
Battle 2: Amorika Entrance

Objective: Kill the leader!
Leader: Bapalu (drops Cure+++)
Enemies: 4 Soldiers, 2 Amazons
Union: Gargastan Kingdom
Guests: Kachua, Vice, Lans, Warren, Canopus, Guildus, Mildain
Notes:
  • This is an extremely easy battle, as you only have to control Denim; the Zenobians will kill any of the enemies that cross their path. Don't be too aggressive against Bapalu, or you may find yourself 1-2 hits away from dying.

Guildus: If the river is one cube width, you can jump over it. Watch! (he jumps over it) But the other side has to be at the same height or lower.
Canopus: A winged creature can move anywhere. The type of terrain and height of the land does not hinder our movement. (flies toward the enemy) But you cannot let me attack alone. It is critical to work as a team.
Mildain: Be alert, always check to see who will move next. (moves) If you want to move quickly, don't carry heavy weapons and unnecessary items.
Lans: Check the guardian element of the enemy you are about to face. (moves) If you fight with an opposite element, like Wind vs. Earth or Fire vs. Water, you may give them good damage. But the possibility of the damage you get from them will be greater. In other words, you are taking a risk. To avoid this situation, you should check the type of terrain you're fighting on.
Warren: Since your MP will be 0 at the beginning of the stage, magic is unavailable. (moves) MP will accumulate as WT counts down. The more powerful the magic, the more MP will be consumed.
Bapalu: I see...you heard the rumor of the Duke's execution... Stupid fools! Didn't you realize that it was bait to lure you here?!

Bapalu: (to the Zenobians) You guys are not from the island. Are you from Lodis?!

Bapalu: I-I can't believe I lost...


Lans: Okay, we'll just go straight through. Be cautious.
Canopus: Denim, don't push yourself too hard. Just stay behind us!

(inside Amorika Castle)
Agres: What a disaster, Lord Nybbas is on vacation... Okay guys, these scum bags killed Bapalu! Don't underestimate them. We cannot allow them to take over Amorika Castle. Let's show them what we've got!!!

Agres
Knight
Battle 3: Amorika

Objective: Kill the leader!
Leader: Agres (drops Blessing)
Enemies: 3 Soldiers, 3 Amazons
Union: Gargastan Kingdom
Guests: Kachua, Vice, Lans, Warren, Canopus, Guildus, Mildain
Notes:
  • Once again, the only person you control is Denim. Most likely you won't even get a chance to attack the enemy before the Zenobians kill Agres.

Agres: (to the Zenobians) Where are you from, strangers? Why are you involving yourselves in the war? This is a war between the Gargastans and Walstanians. It has been fought for centuries. Or are you also trying to get Valeria? Do you have the same ambition as Lodis? Answer me!!
Lans: We have been banished from our country. We are fighting with these youths for the cause of justice.
Canopus: We're looking for a job. Are you hiring?
Agres: We don't need the help of foreigners. We have our own army...
Canopus: If that's the case then...let's get Duke Wrongway...I mean Ronway back and get paid...
Agres: Arrogant fools, fighting for money! Your end is near!

Agres: I...I can't believe I lost to a bunch of kids and a chicken man... Impossible...


In the conference room, Denim and his comrades meet Duke Ronway for the very first time. He is very glad to have been rescued, and is even more encouraged that he was saved by Walstanian youths. When he meets the Zenobians, Ronway shows some concern that the Zenobians may have the same intentions as Lodis. Kachua eases his fears. As a result, Ronway asks the Zenobians to stay behind and train his soldiers while guarding the castle. They accept his offer, and leave the room.

Ronway makes Knights out of Denim and Vice, and allows them to head their own battalion. This is where you get to name your Knight Order. The Duke asks Denim and Vice to go after his trusted Knight Leonard, who had gone to a town called Krizar in search of Necromancer Nybbas. As a parting gift, Duke Ronway gives the two of them 20,000 Goth and 8 troops (4 Soldiers, 4 Amazons).

In the main hall, Lans and the other Zenobians wish Denim, Vice, and Kachua luck on their journey. Lans offers them the advice that if they want to survive, they should train before going into battle.


Scene 3: Tanmas Hill

Oruba: I never expected to see the Walstanian Rebels in this area. I bet you guys came here to help the fools that preceded you. Well, it's not going to happen.
(out of nowhere, Canopus appears)
Canopus: I don't feel right leaving you guys. I will stay with you. (to enemies) Whoever wants to end up as a dead carcass can challenge me!!


Oruba
Wizard
Battle 4: Tanmas Hill

Objective: Kill the leader!
Leader: Oruba (drops FireBurn)
Enemies: 3 Soldiers, 3 Amazons
Union: Gargastan Kingdom
Guests: Kachua, Vice, Canopus
Notes:
  • One of the enemy Amazons has a Spear. You may want to try and persuade her to your side, or kill her in the hopes that she'll drop it.

Oruba: I can't die...here...


Join up!

Canopus
Eagle Man


Scene 4: Krizar

Presance: Look at the numbers of Undead... How dare they treat a dead soul like this...I will send these dead souls to the eternal darkness... Souls of the Undead, I command you to fall!
(casts Exorcism on a nearby Skeleton, and vaporizes it)
Presance: Hang in there Leonard! Hang in there until our reinforcements arrive. ...AH! Look over there, the Liberation Army is here. Praise the Gods.
Mordoba: Your friends are sleeping in the house. It is the sleep of death. When they wake up, they will turn into the Undead. (turns to house, and addresses her comrades) We will fight until our lord Nybbas returns. Do not allow them to go any further!


Mordoba
Witch
Battle 5: Krizar

Objective: Kill the leader!
Leader: Mordoba (drops Stun)
Enemies: 3 Soldiers, 2 Skeletons, 1 Ghost
Union: Gargastan Kingdom
Guests: Kachua, Vice, Presance
Notes:
  • One of the enemy Soldiers has a Spear, in case you want to persuade him to get it. You can't buy them at shops yet, so getting an extra one here would give you an advantage.

  • This will be the first of your two chances to recruit undead characters in Chapter One. They provide good distractions for your enemies, and are particularly useful since none of your enemies have Exorcism yet. Also, the Ghost has Incubus, which you can't normally get until later in Chapter One.

  • Presance is one of the easiest guests to save--if only all guests were as easy! He can take a bit of a beating from the surrounding enemies since he's got a level advantage over them. As he accumulates MP, he'll use Exorcism to wipe out the undead characters--make sure you recruit any that you want before that happens! Try to get to Presance as soon as possible so that he doesn't get overwhelmed.

Mordoba: Lord Nybbas...have you abandoned me...?


In the house, Denim and his comrades meet Leonard for the first time. If Presance is alive, he is there as well; if he didn't survive the battle, then he is replaced by a Cleric named Felicia (who has all of the same equipment as he did).

Leonard thanks Denim for saving the his and his comrades' lives. When he finds out about the casualties that his forces suffered against Nybbas' troops, he becomes angry and wants to avenge his comrades that died. Presance announces that Nybbas has been seen in a nearby fort. While Leonard believes that he must go to the fort to kill Nybbas, Presance suggests that the whole group returns to Amorika to get further instruction from Duke Ronway. At this point, it's your choice as to what to do...

Join up!

Sara
Archer
Join up!

Voltel
Knight


Join up!

Presance
Exorcist
Join up!

Felicia
Cleric


Note: You will only get Felicia if Presance did not survive the previous battle.


Scene Alpha: Fort Kadoriga

Required Conditions: After Krizar, go to Fort Kadoriga before going back to Amorika.

Nybbas: Ah, welcome. I'm impressed that you made it this far. So, Mordoba is dead. Too bad. She was very helpful in my research and other things too... But why don't you forgive me? If you want me to apologize, I will do so. I am of Gargastan blood. But I don't care who rules this island, I don't even care who wins. So, why don't you let me go? You don't have to waste your time.

Denim:1. Relax.
2. Shut up!
Denim: Relax. I have no will to kill a weakling like you. But I will not set a criminal free, either. If you want to repay your dishonorable actions, then I will bring you to Amorika Castle.
Nybbas: Good boy! I like you. You lead your people well...but I don't trust you. I know others are dying to kill me. Stupid fool...I shall call demons from the very depths of Hell to destroy you! (summons undead) Now show me! Show me your deep attachment to life! Ha ha ha...


Denim: Shut up! You evil magician...you disturb the souls of the dead...
Nybbas: You're a disappointment. You cannot even begin to comprehend the truth. But then again, you are young. How can a lad who hasn't even lived a quarter century understand me? Too bad...I shall call demons from the depths of Hell! (summons undead) Now show me what you can do. Your confidence has no foundation!


(regardless of which comment you chose, you'll end up in the same battle)


Nybbas
Necromancer
Battle Alpha: Fort Kadoriga

Objective: Kill the leader!
Leader: Nybbas
Enemies: 2 Soldiers, 2 Ghosts, 1 Skeleton
Union: Gargastan Kingdom
Guests: Kachua, Vice, Leonard
Notes:
  • This is a heck of an opportunity to recruit some undead characters for your team. The two Ghosts each have Incubus, in case you wanted to know.


(after you defeat Nybbas)
Nybbas: You have indeed overcome your weak mind. You have made great progress. But I cannot allow myself to die here. My research is more important than this. Denim, is it not? I shall remember your name. If you live, we shall meet again. I will show you the progress of my research then. Farewell... (escapes)


Scene 5: Amorika

Leonard tells Duke Ronway about everything that happened, and about how Denim's help made any form of success possible. After thanking Denim for his bravery, Duke Ronway asks Denim, Vice, and Kachua to go along with Leonard to Fiduc Castle in the north, where the Dark Knights are stationed. There they will attempt to sign a non-intervention treaty with the Dark Knights. Denim, Vice, and Kachua all object to this, blaming the troubles of Walsta on them; however, the Duke convinces them that this is the best thing for the people of Walsta right now. They agree to go, and Ronway gives them 10,000 Goth to restock their supplies and buy new equipment.


Scene 6: Gruborza Plains

Brenzen: Just my luck. The Liberation Army is here.
Soldier: We cannot win with our limited manpower! Let's retreat and not look back!
Brenzen: Shut up you wimp! Don't you have any pride?!
Soldier: But look at them. They've got bigger swords than us...it's obvious that we can't win.
(soldier turns to flee but Brenzen hits him from behind, killing him)
Brenzen: You're just scared because they took over Amorika Castle. Why don't you just run home to your mama!! (to others) Follow me! I will show you the strength of Gargastan!


Brenzen
Berzerker
Battle 6: Gruborza Plains

Objective: Kill the leader!
Leader: Brenzen (drops Phlanka Axe)
Enemies: 2 Soldiers, 1 Wizard, 1 Amazon, 1 Cleric
Union: Gargastan Kingdom
Guests: Kachua, Vice, Leonard
Notes:
  • One of the enemy Soldiers has the Chain Mail. That's better than any armor you have at this point, so get it if you can!

  • The Cleric has Heal. Given that you can't buy this spell until Chapter Two, you may want to persuade the Cleric so that you have an extra healer or at least another Heal spell.

Brenzen: ...Glory...to Gargastan!!


Scene 7: Rime

(in the city, Gargastan troops are surrounding a woman)
Ryumos: Why don't you give up?! Or do you want to die here?
Sisteena: If you want to kill me, go ahead. I may die but my ideals will live on!
Ryumos: Stubborn bitch...kill her!
(enemy Dragon attacks Sisteena, but she dodges)
Ryumos: ...Huh? Who are you?!
Leonard: (to Denim) She is not from the Liberation Army. Does she belong to another organization?

Denim:1. Let's help her!
2. I'd like to...
Denim: I'd like to help her, but we have to minimize our losses first.
Kachua: Are you serious?! Look, she is fighting against the Gargastan forces alone!
Leonard: We are going to fight the Gargastan Army anyway. We'll help her if we can.


Denim: Either way, we cannot abandon her. Let's help her!


Ryumos
Knight
Battle 7: Rime

Objective: Kill the leader!
Leader: Ryumos (drops Cure++)
Enemies: 1 Soldier, 1 Witch, 2 Amazons, 1 Earth Dragon
Union: Gargastan Kingdom
Guests: Kachua, Vice, Leonard, Sisteena
Notes:
  • Almost all of the enemies have Chain Mail, so you might want to try either killing or persuading them.

  • The Witch has Stun, in case you want to try and get it from her (as you cannot buy it yet).

Ryumos: Am I going to die here...? At least...I need to...


Inside a house, Denim, Vice, Leonard, and Kachua talk to the woman they just rescued (assuming that Sisteena survived). She soon reveals that she is a member of the Valeria Liberation Front, a Bacrumese group that politically opposes Branta, the leader of Bacrum-Valeria. Vice immediately starts flinging terrorist accusations at Sisteena, and Leonard does not seem to be very happy either. If Denim's response at the beginning of the scene was I'd like to..., then he will not say anything during this encounter. Leonard will order Sisteena to leave and never return. If Denim's response at the beginning was Let's help her! , then Sisteena will ask him why he is fighting, for Walsta or for true peace. Regardless of what Denim actually says, Leonard will tell her to leave Rime and never return.


Scene 8: Fiduc Castle

When Denim and the group arrive at Fiduc, they are "greeted" by a Templar Knight. Leonard gives him a message, and he goes into the castle and comes back out with Dark Knight Balzepho. Balzepho invites them into the castle so that they can rest a while.

In the conference room, Leonard asks Balzepho what the Dark Knights' decision is regarding Duke Ronway's proposal to sign a non-intervention treaty. Balzepho says that they should hear the decision straight from the leader of the Dark Knights, and to Leonard's astonishment Dark Knight Lans enters the room. Lans Tartare tells Leonard that, like Branta, they have no interest in the Walsta-Gargastan conflict--they will remain neutral. Lans asks Leonard if the Walsta Liberation Army can really win without external support, because it appears that their troops are quite young; to this, Leonard warns Lans not to underestimate the team of Denim, Vice, and Kachua, as they have accomplished a lot so far. Lans then remembers the three youths as the "heroes of Griate" that everyone is talking about. He asks if he has seen them somewhere before, and Kachua starts to bring up the Griate Massacre that happened a couple of years ago when Leonard silences her and tells her to remember why she is there. At this point, it's Denim's call:

Denim:1. Don't start.
2. We can't...

If you choose the first one, Denim will echo Leonard's sentiments and tell Kachua that this war is not just theirs anymore. If you choose the second one, Denim will say that they cannot compromise with the Dark Knights because they are the enemy. Balzepho and Leonard will silence Denim. In either case, Lans Tartare offers his sincere apology to Denim, Vice, and Kachua, saying that the attack on Griate was based on false information that there were rebels hiding there. Leonard says that the apology is not necessary, and that it was time for them to return to Amorika Castle. He apologizes for the "rudeness" of Kachua (and Denim, if you chose 2.), and the Walstanians leave the conference room. As Kachua is leaving, she looks back at the Dark Knights. Then she exits. Lans then tells Balzepho that Kachua and Denim remind him of how Balzepho and his brother Haborym once were...


Scene 9: Amorika Castle

Back at Amorika Castle, Duke Ronway thanks Denim for overcoming his personal vendetta against the Dark Knights in order to achieve the greater good for Walsta. The Duke says that although it is a bit abrupt, he needs Denim and his group to go to the town of Baramus. Baramus is supposedly a Walsta self-governing district, but in reality it has become a Walstanian concentration camp. The people there are tired of fighting and are enduring mistreatment at the hands of the Gargastans. Ronway wants Denim to go to Baramus and revive the courage and hope of the Walstanians there, motivating them to revolt. He knows it will be difficult to do, but if anyone can motivate the people, it is the Hero of Griate. Denim leaves the room and heads outside; after he leaves, Leonard assures Ronway that everything is going according to plan.

Outside, Denim finds Holy Knight Lans gazing at the sunset. Lans asks him if there's anything bothering him, and Denim reveals that he is worried about the trip to Baramus. Lans says that it's not like him to be scared, but being scared is nothing to be embarrassed about. Denim asks Lans if he ever gets scared, and Lans says that he gets scared whenever he goes into battle. However, he knows that he must survive, and that thought eases his fears. Denim says that although he always thought that he would die for a revolution, he realizes that he fears death; with this, Lans explains to Denim the difference between risking your life and dying. He says that Denim has to live for Kachua, and then Denim asks him who he lives for. Lans pulls out a music box, and tells Denim that he lives to carry on the memory of his late wife. He tells Denim about how his wife got sick and died while they were being chased by the Empire's men, and about how he considered committing suicide many times. Lans says that the music box belonged to his wife, and it reminds him of how precious life is; it tells him that he has to survive, he has to carry on. He expresses his hope that there will be a day when a young lad like Denim will not have to fight.


Scene 10: Bordo Lakeside

Lexent: I never expected to see the Walstanians here! They have amassed quite a few troops... This could be bad...Lord Barbatos doesn't understand. I keep telling him that it's crucial to protect the front line in this area.
(enemy Soldier turns and begins to run away)
Lexent: Hey you! Are you running away?! Get back here now or face the consequences! (Soldier returns) Troops, do not allow them to cross over Lake Bordo! Charge!


Lexent
Knight
Battle 8: Bordo Lakeside

Objective: Kill the leader!
Leader: Lexent (drops Cure++)
Enemies: 3 Soldiers, 1 Wizard, 2 Amazons, 1 Archer
Union: Gargastan Kingdom
Guests: Kachua, Vice
Notes:
  • One of the enemy Amazons has the Matou Claw . You have to persuade her to get it, and I strongly recommend doing so as it is by far the most powerful one-handed weapon you'll be able to get until Chapter Three.

  • If you find yourself needing an extra member, check out the Soldier that tried to run away. His loyalty towards his side is extremely low, and he should be relatively easy to persuade even at full HP. Do save the game before trying, though!

Lexent: This is why I kept telling him...Lord Barbatos, curse you!!


Scene 11: Zodo Marsh

Ganb: You broke through the front...? Just plain luck, I suppose... This is as good a time as any to test my babies. I have invested a lot of time in these beasts... Belda! (Belda flies in) Obda! Come! (Obda flies in) Come here! It's your time to fight! (Lizard Men appear) Belda! Obda! Show them your power!!


Ganb
Beast Tamer

Belda
Gryphon

Obda
Gryphon
Battle 9: Zodo Marsh

Objective: Kill the leader!
Leader: Ganb
Enemies: Belda, Obda, 1 Wizard, 1 Witch, 3 Lizard Men
Union: Gargastan Kingdom
Guests: Kachua, Vice
Notes:
  • If you want to end this battle quickly, just attack one of Ganb's Gryphons. As soon as you get one of them to critical HP, Ganb will tell his pets to retreat and the battle will end.


(if you seriously wound one of his Gryphons)
Ganb: Belda?! (or Obda?!, if Obda was the one that was wounded) Are you okay? This is bad. Retreat! What have you done to my babies?! I will never forgive you! (they retreat)

(if you seriously wound him)
Ganb: Argggh!! The pain... I guess I underestimated you kids... Belda, Obda, retreat! I will remember this! (they retreat)


Scene 12: Baramus

(at the outskirts of the town)
Soldier: Who are they?! Uh oh...is that the Liberation Army?! The Liberation Army is here!

Battle 10: Baramus

Objective: Kill all enemies!
Enemies: 8 Soldiers
Union: Gargastan Kingdom
Guests: Kachua, Vice
Notes:
  • This battle is very straightforward--none of the enemies have anything special in terms of equipment, and you even have the height advantage. Your goal here should be to finish the battle with as much HP as possible, because the next battle will be significantly harder...

Denim: It will be a while before our reinforcements get here. Let's assemble the group leaders. We will tell the captives our plan and they can decide whether to join us or not.


(inside a house) The attempts of Denim, Vice, and Kachua to persuade the villagers to revolt is unsuccessful. Vice becomes very frustrated with the situation. The villagers believe that fighting is worthless, and one woman even goes as far to blame the fighting on the death of her son. The final verdict from the people of Baramus is that they want absolutely nothing to do with the war. Leonard arrives and asks Denim to speak with him outside.

Outside, Leonard tells Denim that he knew this would happen. He also has another set of orders from the Duke--if the villagers do not cooperate, then Denim and his troops should disguise themselves as Gargastan troops and kill all of them. Denim is shocked to hear this, and Leonard tells Denim about a secret meeting that he had with Duke Ronway on the matter. The motivation behind the massacre is that it would unite the remaining people of Walsta, since they would be determined to avenge the slaughtering of their fellow Walstanians. At this point, Denim has to make what is quite possibly the most important decision in the entire game:

Denim:1. I understand.
2. No way!

Denim: No way! How can you achieve peace by murdering innocent people?!
Leonard: You are still young...I envy your pure soul...if you can't stain your hands to achieve that ideal, you have no business being involved in this war! (swings sword at Denim, knocking him back)
(Kachua and Vice come outside)

Kachua: Denim! (runs to Denim) Denim, are you all right? Vice, come here! Vice? What are you...? No, don't do this to us!
Leonard: Kill them, Vice! Kill them both!
Vice: (with a new sadistic look) ...What an idiot! People with no will to fight for their freedom are...already dead. No matter how many we kill, it doesn't matter. Those people should be happy to die for Walsta.
Kachua: Are you serious? What has happened to you Vice?!
Vice: Shut up, Kachua. Stop treating me like a baby. And you, Denim! How did you become the leader in the first place?! You suck as a leader!
Leonard: Vice, leave them here and follow me. We are going to wipe out the town with or without them!
(Vice and Leonard leave)
Denim: Wait, Leonard! Vice!


Battle 11C: Baramus

Objective: Kill all enemies!
Enemies: 3 Knights, 1 Wizard, 1 Witch, 2 Archers
Union: Walsta Liberation Army
Guests: Kachua
Notes:
  • This battle is quite a bit more difficult, because you have the height disadvantage and are probably somewhat weakened from the previous battle. The key to winning with minimal losses is to have your team members stick together and focus on taking out one character at a time.

  • Almost all of the enemies have some equipment of interest. The Archers have Great Bows, the Wizard has the Life Staff, the Witch has the Clear Staff, 1 Knight has the Phlanka Axe and the Chain Mail, and another Knight has the Heavy Hammer and the Chain Mail. These enemies will leave their weapons when killed, so you don't need to persuade them. Especially in the case of the Life Staff and the Clear Staff (as they are one-of-a-kind items), be sure that neither the enemy nor Kachua steps on the treasure bags left behind, or you'll lose out!

(Vice's voice is heard coming from somewhere)
Vice: ...After this, it's your turn. Until then...


Denim: I understand. I will stain my hands to achieve our ideal.
Leonard: I am so sorry to put you in this position. But they will not die in vain...
(Kachua and Vice come outside)
Vice: Denim! Are you serious?! Have you gone mad?!
Denim: We can't achieve victory by only following ideals. We have to be more practical.
(Vice shoves Denim)
Vice: What has happened to you?! You talk as if you were the enemy!
Leonard: Vice, are you against this? Why don't you se the big picture?
Vice: Of course I see it! Murdering innocent people is not the way to achieve our dream!
Leonard: We need martyrs...we need to capture the hearts of those not willing to fight yet...
(swings sword at Vice, knocking him back)
Vice: Kachua! How about you?! Are you going to allow this?!
Kachua: I...I...I am always with Denim!
Vice: (running away) Denim! From now on, you and I are enemies!
(in the distance, a soldier's voice is heard)
Soldier: Kill the Liberation Army! Not a single member must survive!
Leonard: Damn it, it's the supporting army of Gargastan. Take care of them. I will take care of the town.
(Leonard leaves)

Battle 11L: Baramus

Objective: Kill all enemies!
Enemies: 1 Knight, 2 Berzerkers, 1 Wizard, 2 Archers, 1 Cleric
Union: Gargastan Kingdom
Guests: Kachua
Notes:
  • This battle is quite a bit more difficult, because you have the height disadvantage and are probably somewhat weakened from the previous battle. The key to winning with minimal losses is to have your team members stick together and focus on taking out one character at a time.

  • Almost all of the enemies have some equipment of interest. The Archers have Great Bows, the Wizard has the Life Staff, the Cleric has the Clear Staff, 1 Berzerker has the Phlanka Axe and the Chain Mail, and another one has the Heavy Hammer and the Chain Mail. These enemies will leave their weapons when killed, so you don't need to persuade them. Especially in the case of the Life Staff and the Clear Staff (as they are one-of-a-kind items), be sure that neither the enemy nor Kachua steps on the treasure bags left behind, or you'll lose out!

(Vice's voice is heard coming from somewhere)
Vice: ...Be sure to stay alive, so that I can kill you myself!!


Ending Thought: Can I stain my hands to achieve my ideal?


Chris: Your decision regarding the Baramus Massacre determines which path you will follow in the game.

If you chose not to go along with the massacre, you will go on to
Chapter Two of the Chaos Route.

If you chose to obey orders, you will go on to Chapter Two of the Law Route.

Alternatively, you can choose to go back to the Valeria Page.